Rudder cables, pedals and brake system mostly installed

Another delayed post - last year we ran the rudder cables through the fuselage and tailcone:

Rudder cables entering the tailcone

Rudder cables attached with clamps near the tailcone exits

Rudder cables running from forward tunnel all the way to the tailcone

Rudder cables running from the pedals back through the tunnel

Rudder cable tips (temporarily) attached to the rudder

After an attempt at making my own brake hoses and getting OK but not great results, I decided to order them from Aircraft Specialty, and the difference is very clear:

Aircraft Specialty brake hoses

Aircraft Specialty hose (top) vs my previous attempt (bottom)

We test-installed those and the lengths matched perfectly for installing with the Beringer system:

Trial fitting of AS hoses between firewall and parking brake

After quite a while (to wait for a larger batch), I primed the ALIR bracket, as well as the parking brake cable attachment bracket from AS:

Primed ALIR and pedal bracket (along with other parts)

and then put it all together for good, including the rudder pedal itself:

All parts for attaching the parking brake and ALIR

Brackets, ALIR, parking brake and rudder pedal installed in place

Top view of pedal and brake parts

With this, the only remaining part of this section is attaching the hoses permanently and installing the brake fluid reservoir, which I'll do after the firewall insulation and some panel work are done.

Time lapse:


Total rudder pedal and brake system time: 12.4h

Step installation done

On another delayed post, back in Dec 2019 we primed and finished installing the steps, including the inner block:

Step final-installed

Time lapse:


Total step time: 7.9h

Mid-fuselage bulkheads complete (delayed)

There are quite a few steps we did some time ago but never posted, because the videos were too short and I was hoping to have more accumulate, so I'll be posting them soon.

On this one, back in Dec 2018, we riveted the remaining stiffener angles to the center section spars, which was the last step for this section:

Center spar stiffener angle

Time lapse:


Total mid-fuselage bulkhead rivets: 622
Total mid-fuselage bulkhead time: 59.4h

More overhead console work

After clecoing the cabin cover and tailcone forward top skin back in place, we positioned the cabin cover against it (centering with the prior markings), then drilled a few shallow holes for clecos:

Overhead console clamped into place

Overhead console initially clecoed into place

It became clear that the cabin cover itself needs to have some material removed for it to sit flush, so we only drilled 6 holes for now, and will do that adjustment once the cabin cover is off again and upside-down.

We then removed the console and the top tailcone bulkhead, marked the inner surface, and opened up the vent holes to line up with them (as well as the Aerosport controller):

Marking inside edge of overhead console onto top bracket and baggage corrugation

Getting ready to cut top bulkhead for vent brackets

Relative size of cutter to the vent bracket

Alignment of vent bracket to top bulkhead hole

Hole removed from top bulkhead

Vent brackets clecoed to top bulkhead

Since there was some overlap between the bulkhead holes and the corrugation, I trimmed up the corrugation to the limit of the inside surface of the console, to get a little bit more air flow:

Baggage bulkhead corrugation trimmed for bulkhead vent holes

With this, I could finally prime that top bulkhead (along with parts from other sections):

Primed top tailcone bulkhead and vents (along with parts from other sections)

It was then time to open up the overhead vent holes, which we did with a diamond cutter:

Cutting overhead console vent holes

Vent holes cut into overhead console

Aerosport vent fit into the overhead console

And last but not least, we match-drilled the cover plate holes into the console, for #4 screws (which Aerosport said should be more than enough), then attached nutplates to those holes (using CCR264CS3-2s):

Cover plates match-drilled into overhead console

Nutplates riveted to the overhead console

While the cabin cover is in place, I'll work on the door fitting so that the cover only has to come off once more before it's attached for good.

Time lapse:


Total cabin cover rivets: 52
Total cabin cover time: 66.3h

Door pin blocks

I started working on the door pin blocks, starting by positioning and match-drilling the stock blocks:

Van's forward pin block match-drilled into place

Van's aft pin block match-drilled into place

With those reference holes, I then started "sculpting" the Planearound blocks (which are larger) to fit tightly in the same spot:

Planearound pin block next to where it needs to fit

Forward Planearound pin block in place

Aft Planearound pin block in place

"Sculpted" Planearound door block to fit tightly in door opening

All four sculped Planearound blocks

I also started fitting the Plenaround third latch, and since I still have the door halves separate, I'm considering installing it before joining the halves, which avoids the large slots to insert it:

Planearound third latch going through door without slots

I also installed the nutplates inside the door handles:

Door handles with nutplates and screws

Nutplate inside the door handle

I still need to make a final decision on how to install the Planearound system, and still need to actually fit the doors to the cabin cover and join their halves.

Time lapse:


Total cabin door and transparency rivets: 4
Total cabin door and transparency time: 22.5h

Access cover mods for oxygen fill valve and rudder pedals

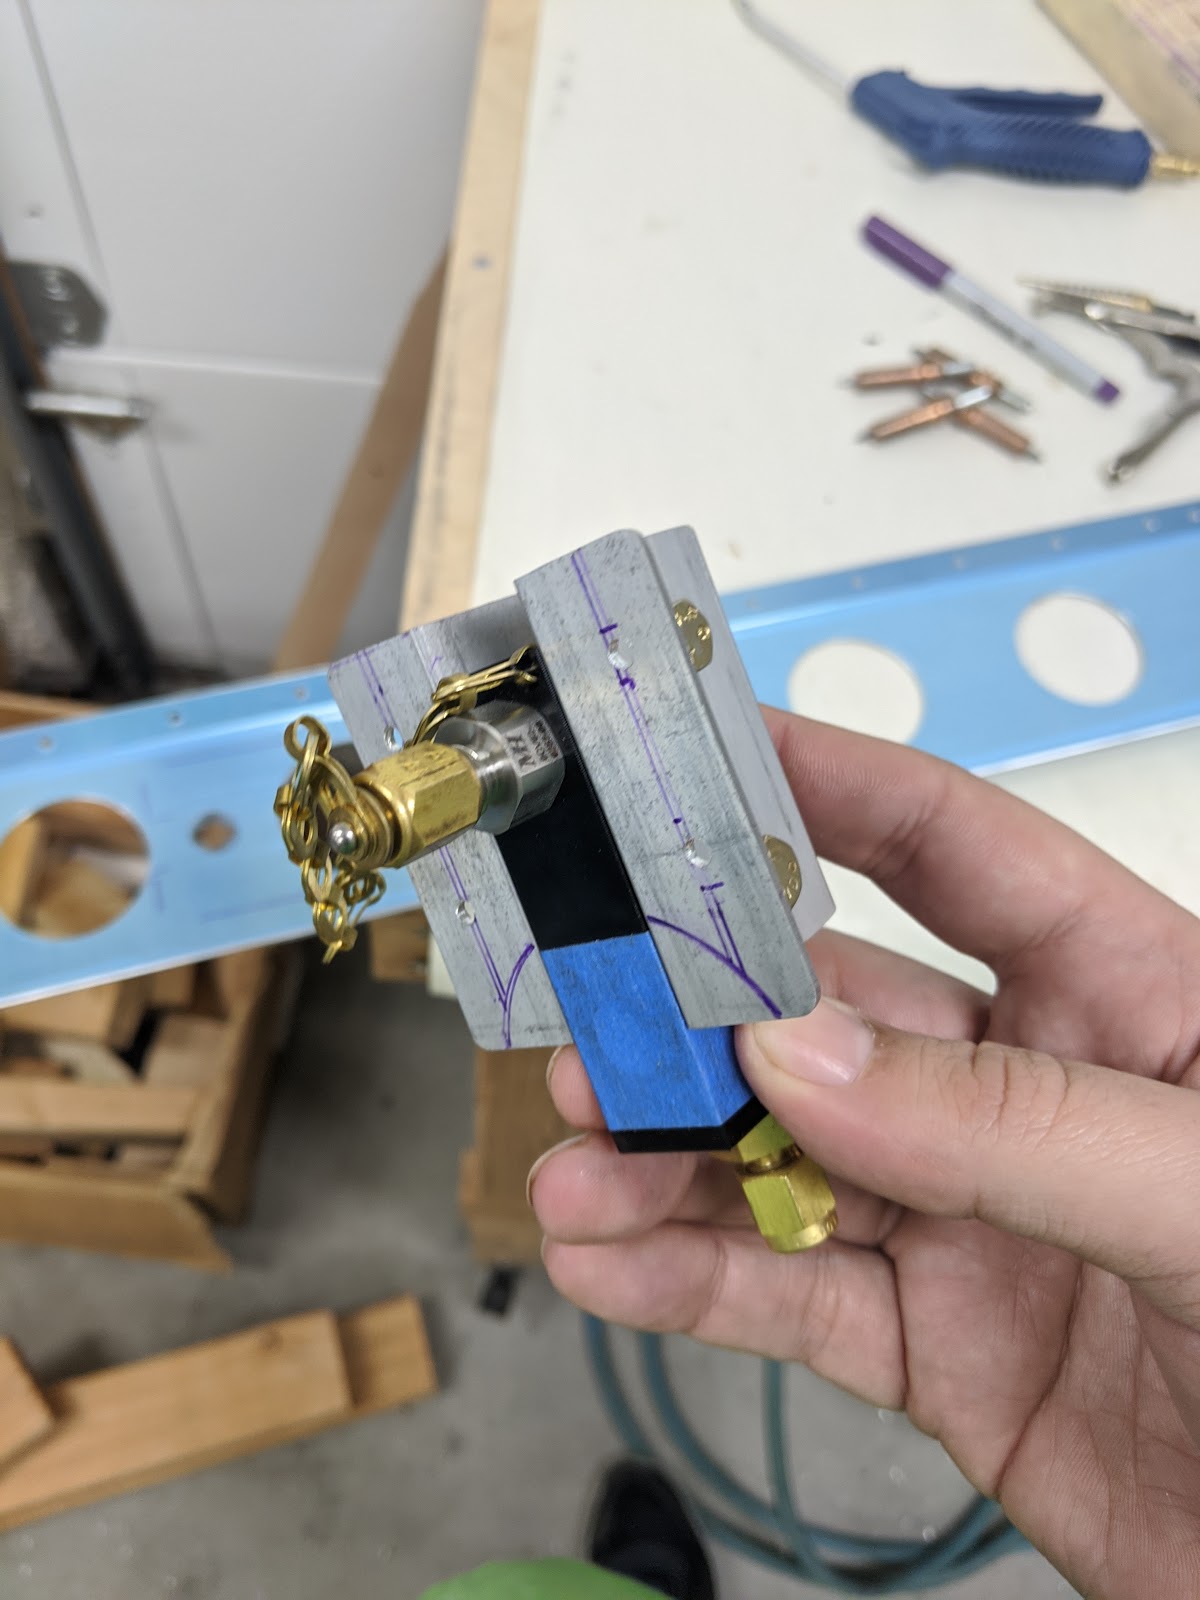
I came up with a way to attach the oxygen fill valve to the seat back brace closetout, using a couple angles to center the gauge through one of the openings:

Oxygen fill valve with angles for attachment

Oxygen fill valve clecoed into place

Aft (visible) side of oxygen fill valve, going through brace closeout

I also dimpled all the floor attachment holes on the ribs, in preparation for attaching the floors (but am still waiting for the 5" GripLockTies to attach conduits before I actually rivet them):

Dimpled floor holes

Once the rudder pedals were installed, I made the openings in the forward tunnel cover for their arms, and split it in two for ease of installation:

Rough markings for rudder pedal arm openings

That gave me a rough initial cut that then had to be significantly enlarged to give clearance around the pedal arms:

Forward tunnel cover split in two, with initial rudder pedal arm openings

Rudder pedal arms going through forward tunnel cover

Forward side of forward tunnel cover, where brake lines go through

Rudder pedal arms going through forward tunnel covers

I then needed to make a splice between the two parts - I cut a piece of .040 slightly larger than F-1051G, and copied the hole pattern from that part:

Splice connecting two halves of the forward tunnel cover

After deburring and primer, I riveted it to the forward section, and also added a bit of edge protection so there's no chance of the brake lines rubbing against the metal on the forward opening:

Forward forward tunnel cover, primed, with the splice riveted, and protected around the brake lines

Time lapse:


Total access cover and floor panel rivets: 306
Total access cover and floor panel time: 27.3h

Doors started

With the finish kit here, we got started on the doors (as someone on Facebook said, "oh joy, doors!"), starting with the rough edge trimming:

Door outer shell marked for trimming

Trimming door inner shell

Trimmed door outer shell

I then sanded part of the inner shells for the gas strut attach doublers, and match-drilled it:

Gas strut attach doubler clamped into place after sanding

Gas strut attach doubler clecoed to the door inner shell

I attached the door a first time just to see what I'm up against - there's definitely a lot of trimming to be done, and it's even possible I may have to build the bottom lip back up to reduce the gap:

Door inner shell initial fitting

Larger than expected gap on the bottom flange

I also got started with some of the door latch parts, trimming/deburring the handle levers to fit, and drilling/countersunking handle nutplate holes:

Handle levers trimmed to fit

Handles with nutplate holes

I started drilling the handle mechanism parts, except I'm planning to use the Aerosport low-profile handles, so I'm not doing anything with the stock Delrin block yet:

Match-drilled latch mechanism parts

Likewise, for the Aerosport handles, the tubes need to have a significant length trimmed, as they no longer protrude to attach to the outside handle:

Trimmed handles and handle slides for Aerosport handles

Next I'll start the heavy sanding work to get the doors to fit, and to get the inner and outer shells joined. I'm also seriously considering building most of the latch mechanism while the door halves are still separated, since that seems to be significantly easier.

Time lapse:


Total cabin doors and transparencies time: 14.1h