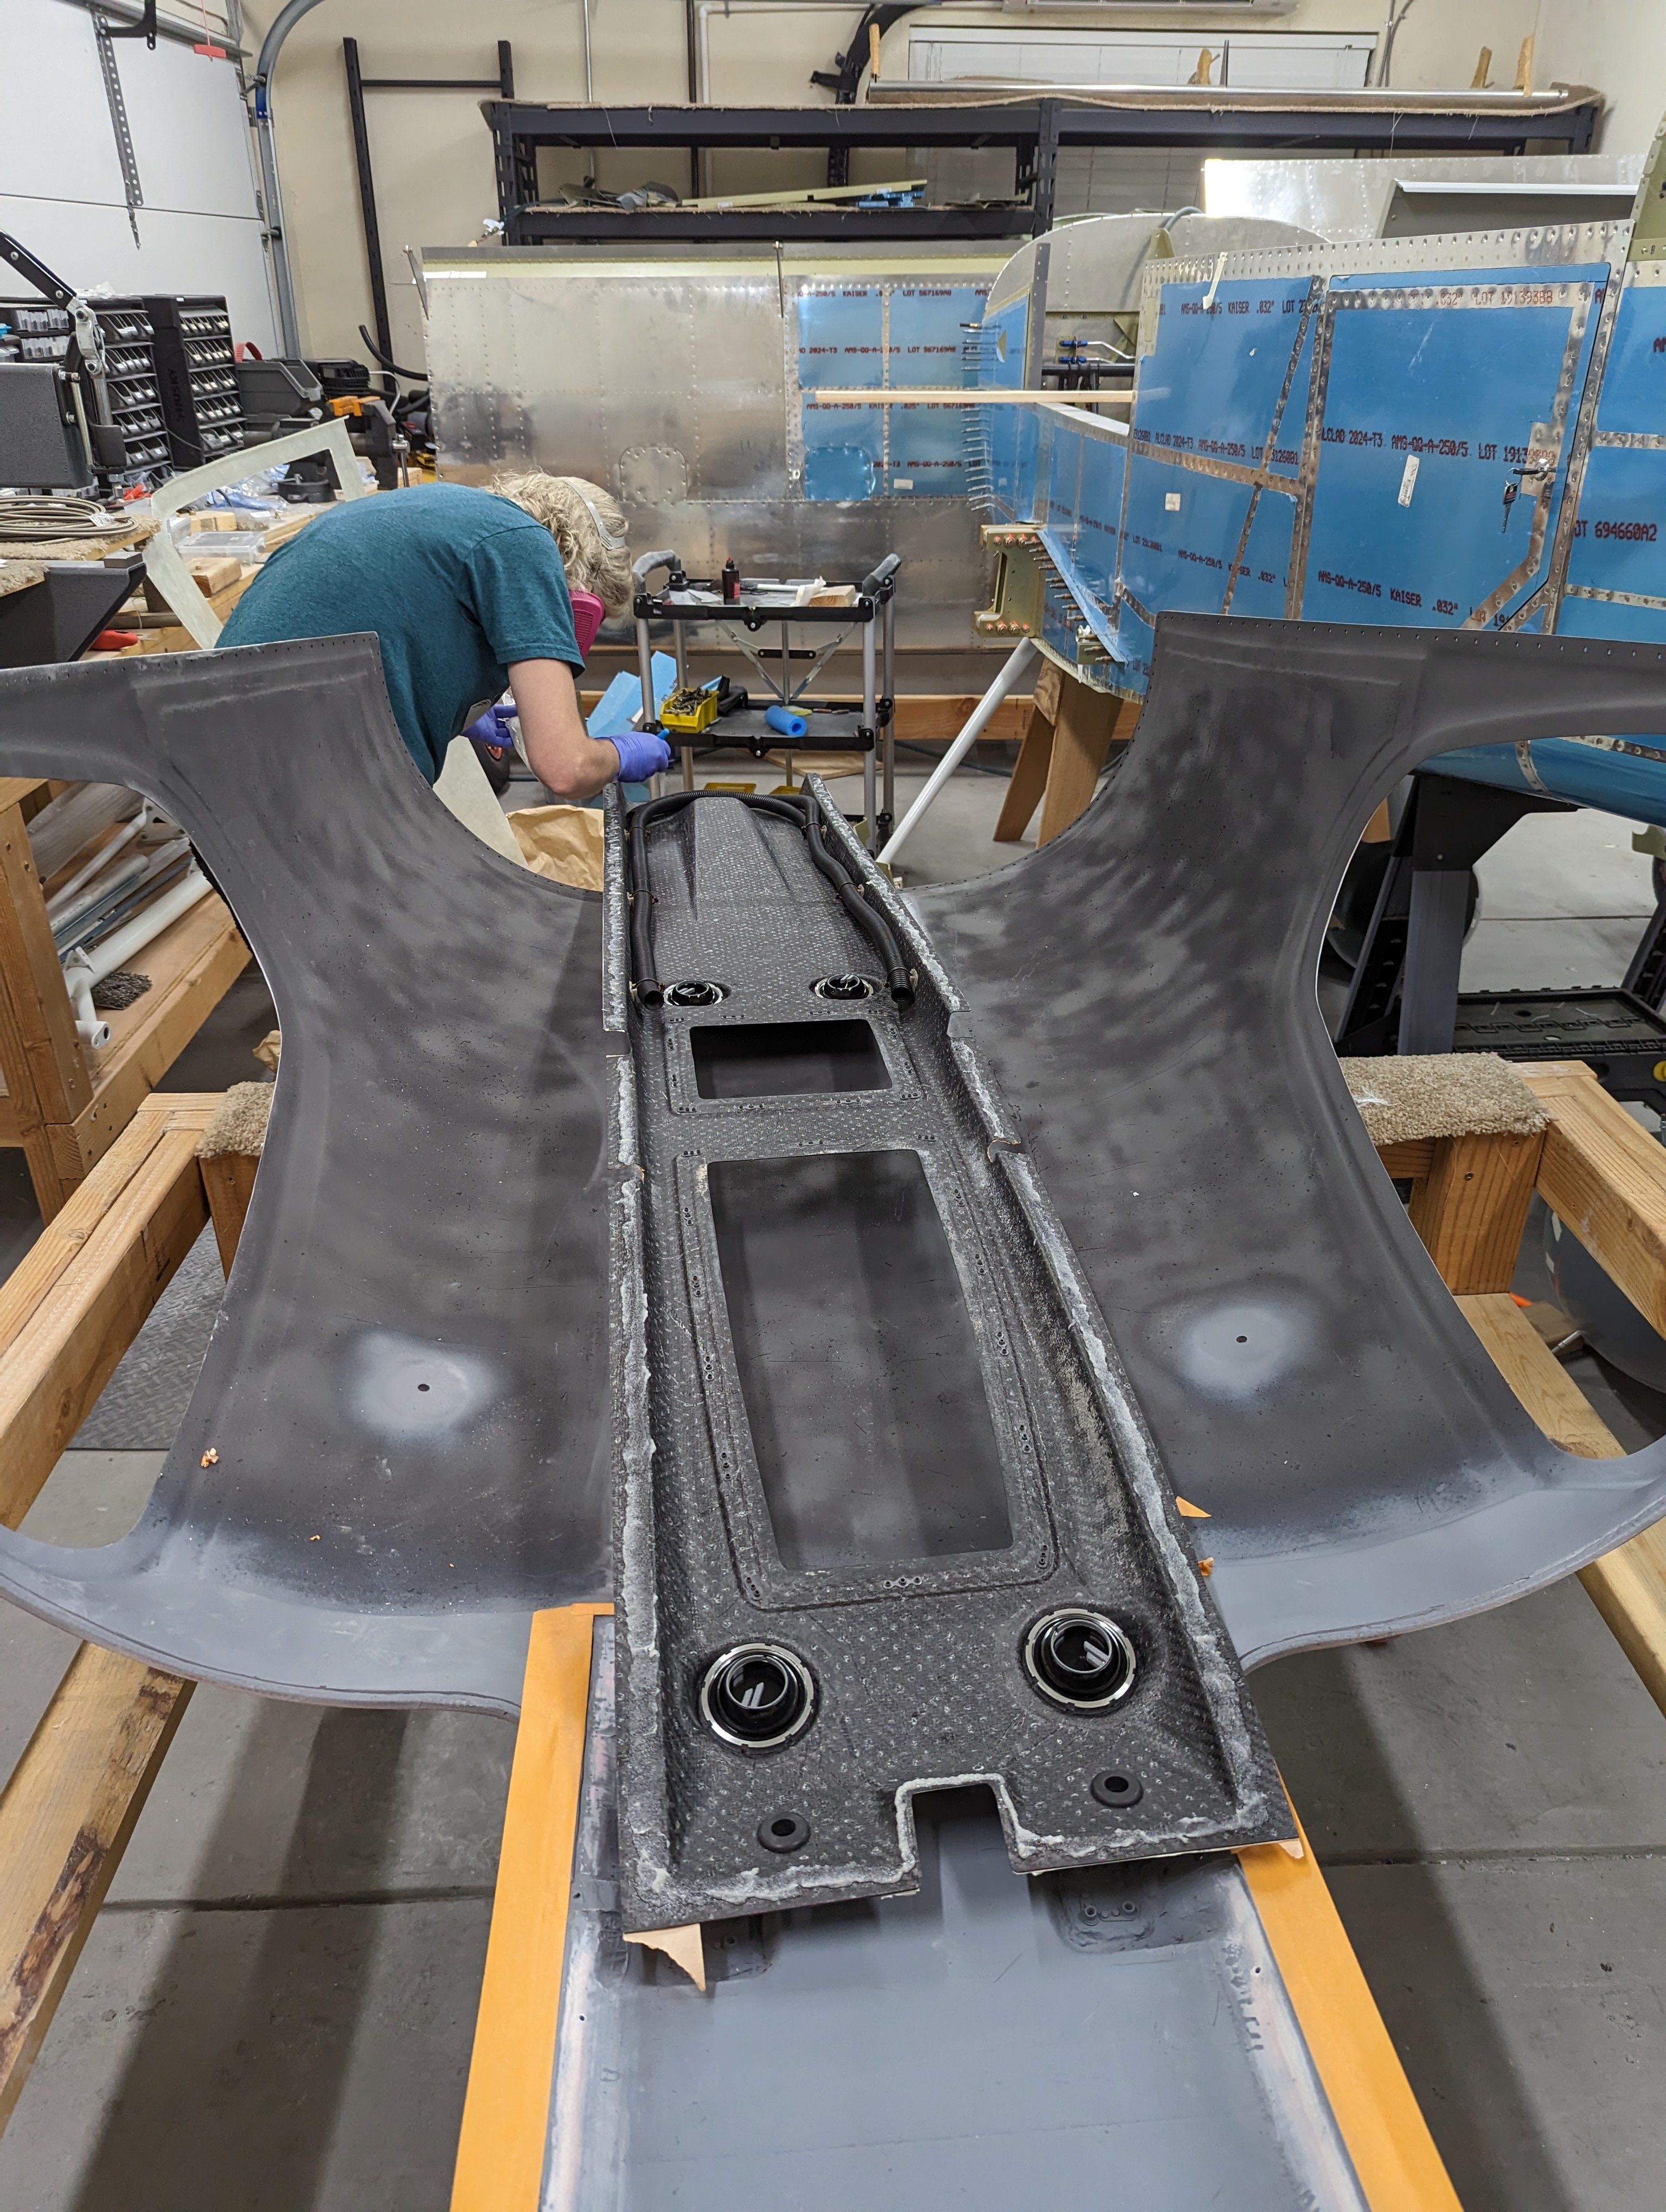
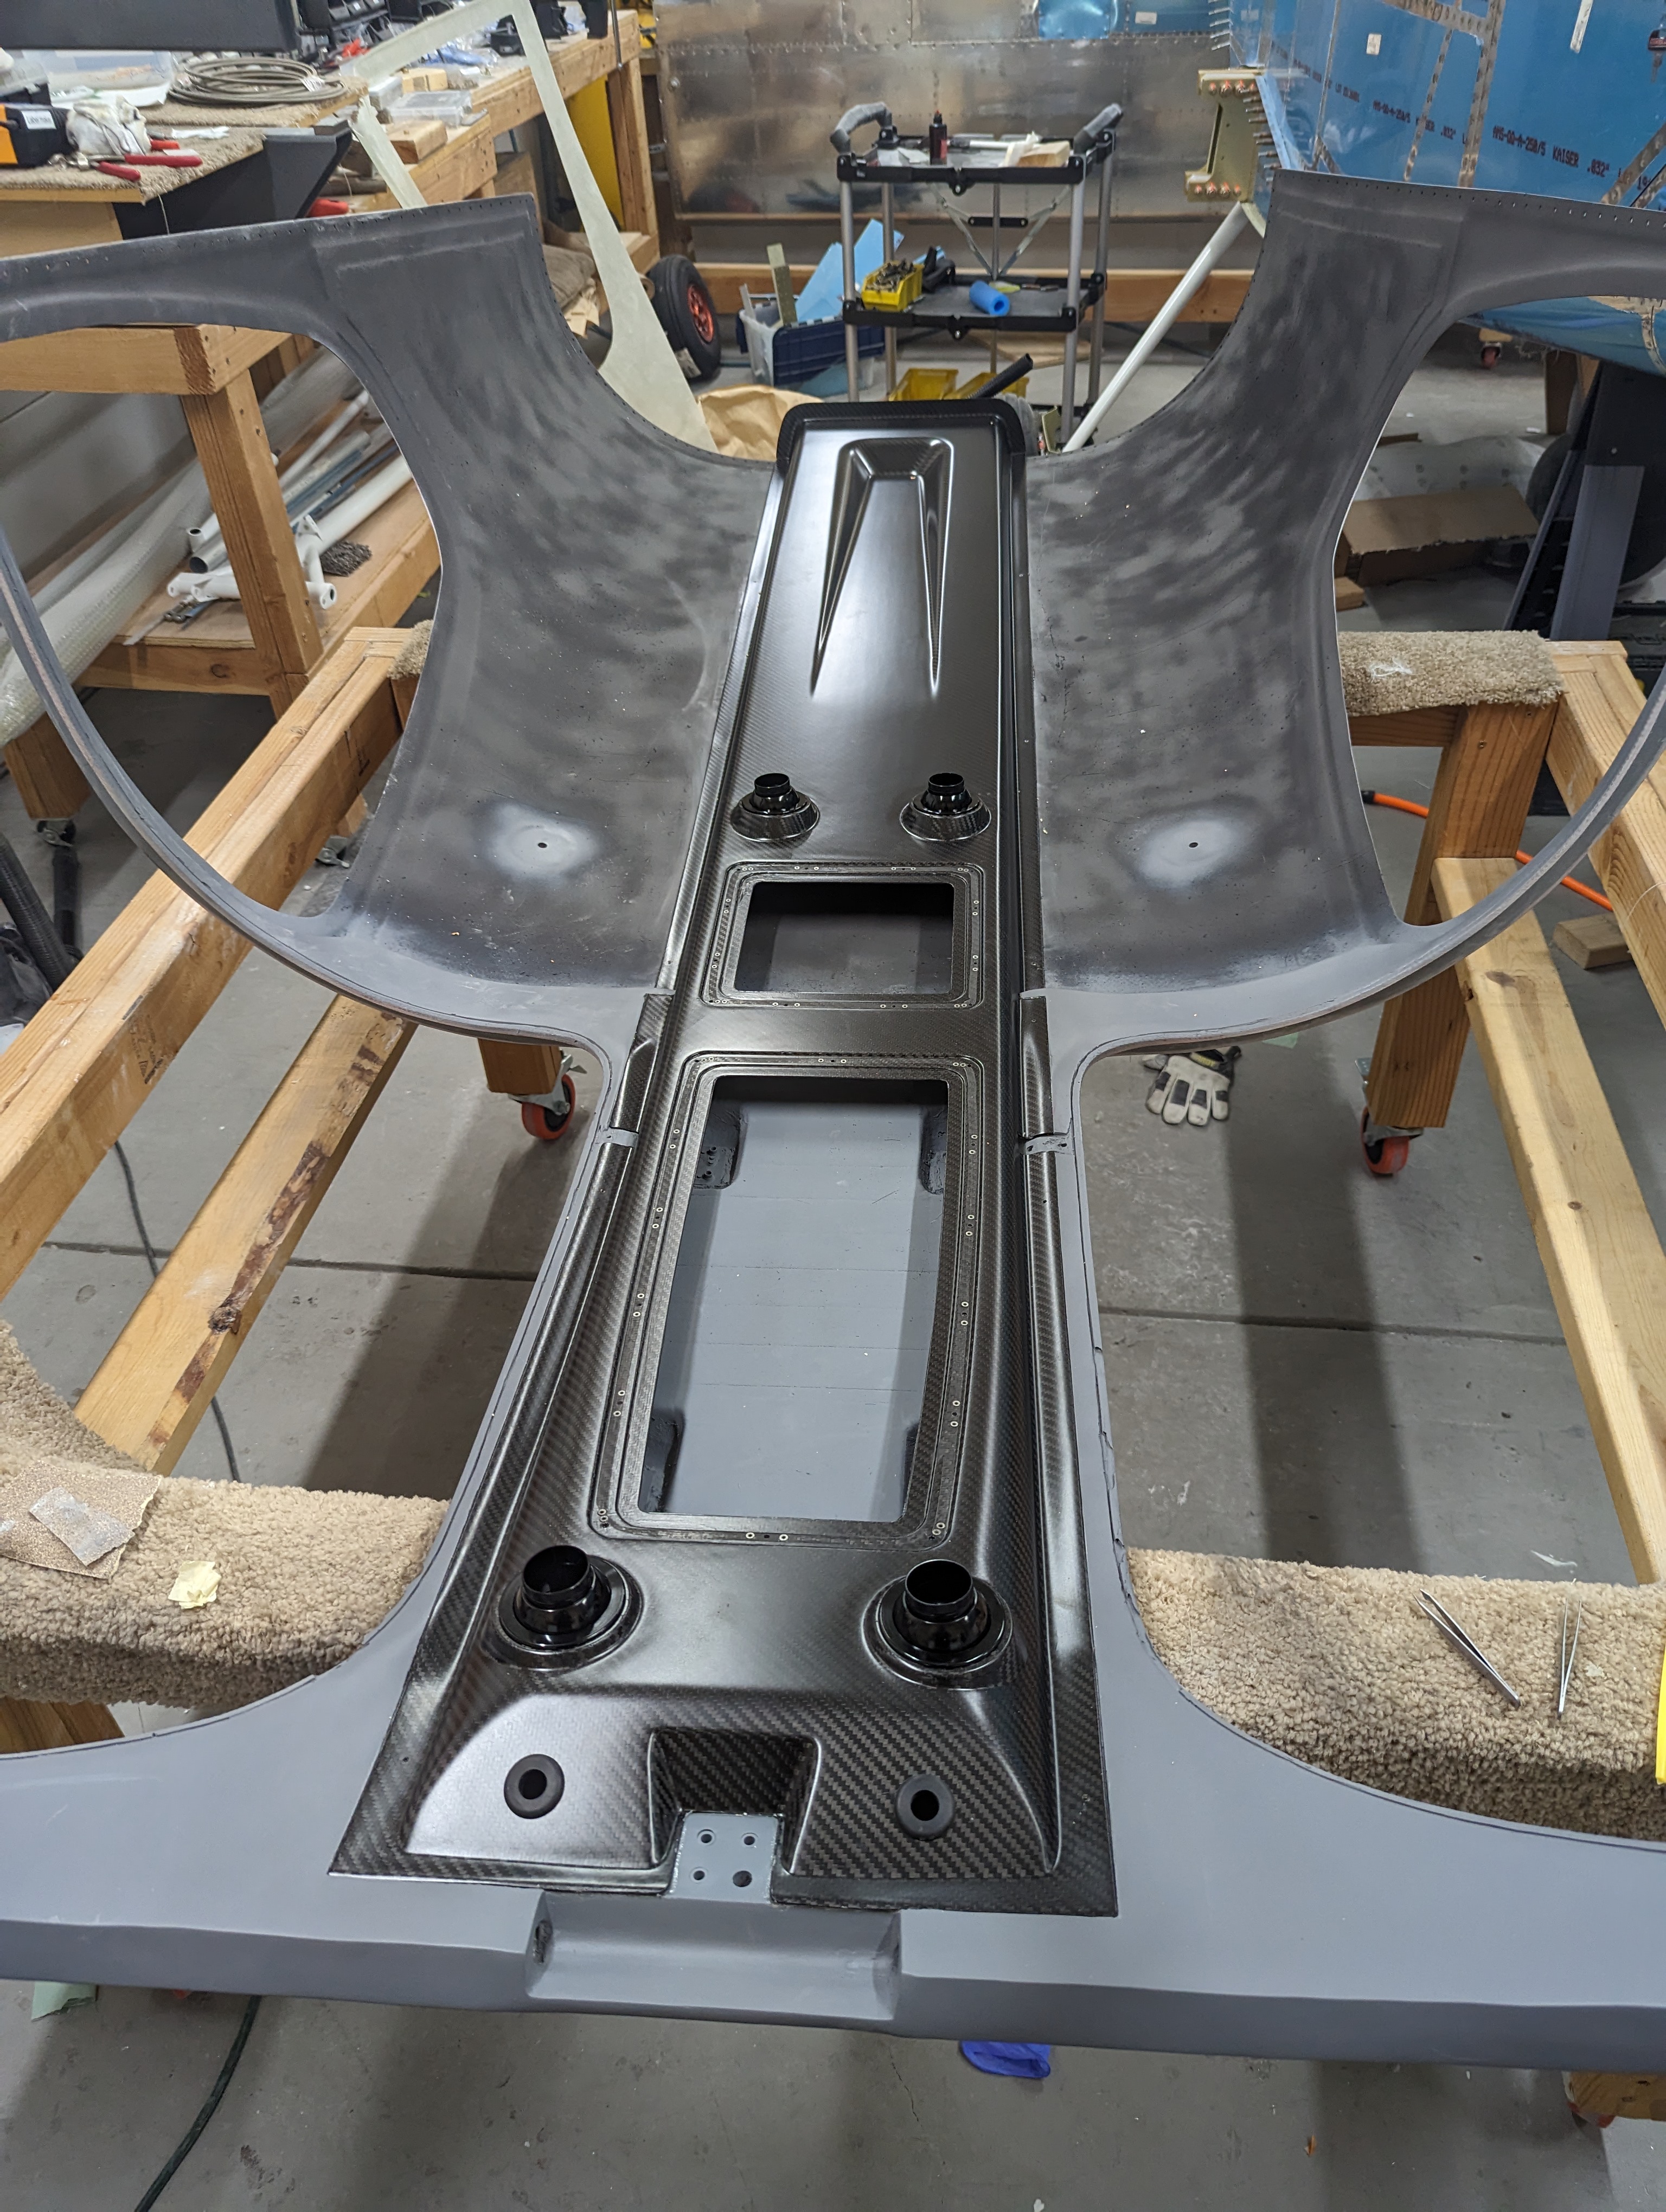
Installing the nutplates for the Aerosport switch pod was a bit of a challenge - the holes were very far forward inside the overhead console, and just not reachable with our hands - so we used a magnet to position them while watching with the borescope, managed to get them clecoed, then set them with CCR rivets:
Holding the nutplate in place with a magnet (on the outside)
Clecoed nutplate inside the overhead console
Riveted nutplates in the overhead console
Because of how close those forward nutplates were to the cabin cover surface, I had to get shorter screws (MS32514-25) to secure the switch pod.
The screws attaching the center brace were a bit too long and hitting the wires, so I replaced the original AN509-10R30s with AN509-10R26/27s:
Center brace bar screws very close to the wires
Shorter replacement brace bar screws
It was then time to fit and trim the windows (we're using Cee Bailey's windows) - they immediately fit inside the joggle without any trimming (but with a variable gap around them):
Test-fitting the rear window
I'll cover the actual window installation in a post about section 45 (section 43 only has you check them for fit and do a first trimming).
Due to a slight miscalculation :D the forward conduit exits were right against the bulkhead attachment screws and nuts:
Conduit exit going right into the attachment nuts
To fix that, we carved out the tip of that opening (while keeping the walls, and created a new thick passage away from it, filling the rest with resin+flox:
Carving out the conduit exit with the Dremel
Carved-out left conduit exit
Carved-out right conduit exit
Wire bundle position for creating the conduit exit
Waxed wire bundle held in the right position to create the conduit exit
Conduit entrance after filling, routed away from the screws
I rounded the edges of the holes, applied primer again, and installed the top screws - with that I was ready to run the overhead wiring:
Finished forward conduit entrance
I also match-drilled the switch pod in place:
Switch pod clecoed in place
I wanted to have some kind of cover for the wires that go into the console near the top, so in order to get the right shape and angles, I 3D scanned that area to design one:
We took some time to finish the edges around the door where the cabin cover was attached to the fuselage - priming, filling, sanding, priming, and finally painting them - with pretty good results that blend in well with the top part:
Priming the bottom cabin cover edge
Cabin cover edge after primer and paint
With this, the next steps on this section are riveting the tailcon top forward skin (which I'm waiting to finish the ground plane extension to do), final-attaching the center cabin brace (which depends on having the panel riveted on, which in turn depends on completing the firewall penetrations), and then the transparencies (those really should be a separate section).
After attaching the cabin cover with resin/flox, it quickly became apparent that protecting the aluminum with tape was a bad idea, as some of the tape actually got caught underneath the resin, and it took us many hours to get it removed:
Tape caught between the cabin cover and underlying structure :(
After digging all the out, we then filled the gap around the edge at a right angle to the aluminum, with resin and microballoons/cab-o-sil (this time using just packing tape, which was pretty easy to remove), then sanded it until it was actually at a right angle:
Cabin cover edge, filled with resin/micro
Sanding the cabin cover edge filling
Cabin cover edge, sanded down to a right angle
We then started the finishing of these edges, filling them:
Filling holes in cabin cover edge filling
Next we need more sanding (and filling, and sanding, and filling, and sanding...) to fully finish the edges, then prime and paint them (the tape we used also removed a lot of the cheap rattle-can paint we used on the aluminum, so that needs to be re-covered).
In a major milestone, we finally attached the cabin cover for good.
Getting it in place was slightly annoying - we had to lower it to a raised position to get the conduits through to the tailcone before lowering it all the way:
Cabin cover slightly raised from position so as to give access to the conduits
Conduits run through to the tailcone
There was also some interference with the conduit area that had to be trimmed:
Interference between the bulkhead side channel and the conduit area
Trimmed conduit area for clearance
With those resolved, it was then time to rivet the gussets, apply resin/flox, and tighten the bolts for the first time (we realized some of them are a bit too long and needed too many washers, so I expect to still change them):
Side gusset riveted in place
Cabin cover gap filled with resin and flox
Gusset area with resin and tightened bolts
Once that cured, I riveted the aft portion of the cabin cover in place:
Riveted aft portion of the cabin cover
The tailcone top forward skin is still not on, mostly because we need to get some sealant for the forward edge before we can attach it.
As a last step in preparing the overhead console, I attached the actual conduits to it, for running cables and wires to the tailcone through the area that's hard to access:
Overhead console with conduits attached
Forward portion of the overhead console where the conduits terminate
It was then finally time to attach the overhead console for good - we sanded sanded the attachment surface so it'd bond to the fiberglass directly, protected the edges to prevent any resin getting onto the finished parts, then used resin and flox to attach it (and after it was fully cured, we tested the attachment and it's strong enough that we can lift the whole cabin cover by it):
Cabin cover surface ready for attaching the overhead console
Applying tape to protect the edges of the overhead console from resin
Applying resin with flox to the overhead console
Overhead console clamped down in place for curing
Overhead console after final attachment
It was then time for the headliners - the process is pretty straightforward and the Aerosport YouTube videos do a good job at explaining it - trim the fiberglass substrate, glue the headliner fabric to it (we found out that the time you wait between applying the adhesive and actually attaching it is critical, especially for the back part - 15 min worked well for us with the Permatex adhesive), trim the fabric more, cut strips for the curved portions, fold it all to the back, let cure, then apply the rubber edge grommet around the window and attach with velcro:
Headliner substrates trimmed to fit the cabin cover and overhead console
Trimming headliner fabric from the headliner substrate
Folding headliner fabric around the edges of the substrate
Attaching edge grommet around the window opening
Headliner with velcro, ready to attach to the cabin cover
Visible side of the headliner
Headliners attached in place
Velcro backing for the headliners
For the lowest and highest velcros, we attached them to the cabin cover first, to avoid the cabin cover rivet strips and the edge of the overhead console:
Velcro strip running next to the cabin cover's rivet strip
The last step was to open up a 3/8" hole through the headliners for the seat belt attachment. The headliner kit comes with spacers (which double as additional attachment for the headliner), though those were surprisingly poorly finished (rough outside surface, too small hole by about 1/128") so they needed some attention too:
Seatbelt attachment spacers inserted in place through the headliners
Seatbelt attachment spacer finish - before (right) and after (left)
With this, the cabin cover is finally 100% ready to attach to the fuselage! (once we finish those wheel pants and lower the fuselage back onto the wheels, that is)