I started section FF1 even before having the FWF kit by assembling the oil cooler box (which I got along with the finish kit).
Oil cooler clecoed to itself
Riveted oil cooler, clecoed to the firewall
I went with one size higher for the actual cooler - the Airflow Systems 2007X instead of 2006X - so I had to modify the mount to fit, by removing the top row of nutplates and attaching them to an angle instead:
Oil cooler mount on top of the oil cooler, for measuring hole positions
Trimmed aluminum angle for attaching nutplates to the top of the oil cooler mount
Oil cooler mount with nutplates on an angle on top of it
Then, per Airflow's instructions, I added a tuning vane to reduce the air pressure difference between the two halves of the cooler, and attached it in place with angles:
Adjusting the tuning vane's position to the center of both openings
Tuning vane with angles for attachment
Tuning vane riveted inside the oil cooler mount using angles
Tuning vane riveted inside the oil cooler mount
Now I'm back to waiting for the engine to arrive before I can continue this section (I've already ordered it from Barrett, a few months ago before the price increases :) ).
I made progress on the EDS-4IP cylinder install, first by attaching the brackets:
O2 cylinder mount brackets and straps in place
I got the loaner O2 cylinder from MH, and checked that it was properly aligned - but also realized I had the wrong metal straps, so I'm exchanging those for shorter ones:
Mountain High O2 cylinder strapped in place
I designed a box to protect it (and even allow lightweight items to be on top), and had it laser-cut and CNC-bent:
Laser-cut, CNC-bent parts upon arrival from SCS
That almost fit well, but was too close up against the rear seat, and made me realize I had a twist in the right baggage cover that needed to be accounted for in the design:
First version of the O2 box, sitting in a tight fit
Significant angle difference on top cover of the O2 box due to twisting
Small gap at the aft portion of the O2 box
Tight fit of the O2 box against the rear seat
Also, the company that CNC-bent them for me apparently doesn't have enough precision for making matching parts (I asked, they basically said that's how it is), so for the second iteration I switched to Oshcut, which was a bit more expensive, but parts were spot on:
Misaligned holes made by SendCutSend
Space inside the box for the cylinder attachment
Second version of the O2 box sitting in place
that was almost perfect, except I forgot to account for the different thicknesses, leaving a tiny gap - so I adjusted again and got just the front lid done again, which fixed it.
Much smaller gap on version 2 of the O2 box
I then match-drilled the box onto the right baggage cover, drilled for nutplates on the cover, and deburred everything:
O2 box (version 3) match-drilled into place
Right baggage cover drilled for nutplates to attach the O2 box
Last on the box, I added a couple of stiffener ribs to support a little bit of weight on top - I made sure to position them away from the attachment straps:
O2 box ribs match-drilled into place
On another baggage area leftover item, I had one rivet left to attach the upper baggage door seal channel, which unfortunately required removing the bolts that join the longerons together - since I had the top forward tailcone skin off, I remove them and set the rivet:
Last, hard-to-reach rivet attaching the upper baggage door seal channel
Next will be applying primer on the O2 box parts and riveting it all together.
We removed the cabin cover for the last time to finish it up.
There was a pretty big gap between the cabin cover and the overhead console (about 1/4") - I sanded the cabin cover surface a bunch to reduce it, but it became clear that there was no way I was going to close the gap fully without making the fiberglass pretty thin (or getting to the foam core), so instead we built up a "shim" down from the cabin cover to meet the console:
Gap between the cabin cover and overhead console
Laying up fiberglass shim for the overhead console
Overhead console in place to form shim
Overhead console shim after curing
No more gap between the cabin cover and overhead console
With that, I finished drilling the overhead console to attach it (when we previously detected the gap, we had only made a couple of holes - just enough to keep it in place but not enough for the attachment later):
Overhead console clecoed in place
I also made holes for running wires between the console and the switch pod:
Wiring holes on the overhead console
Wiring holes with the switch pod in place
I also attached the ventilation flanges for the overhead console, and riveted the baggage bulkhead channel to the top bulkhead - this may make it a bit harder to rivet the tailcone top skin later, but I didn't really have a choice due to the ordering of attachments:
Overhead ventilation flanges riveted in place
Finally, I started sanding the uncovered parts of the cabin cover, but that's one large exercise in patience, so there's a lot more to do there.
Before joining the tailcone to the fuselage, I cut and drilled a tray for avionics (to be refined later when I actually have the avionics to mount):
Match-drilling the tailcone rails to the avionics rack
Avionics rack screwed in place
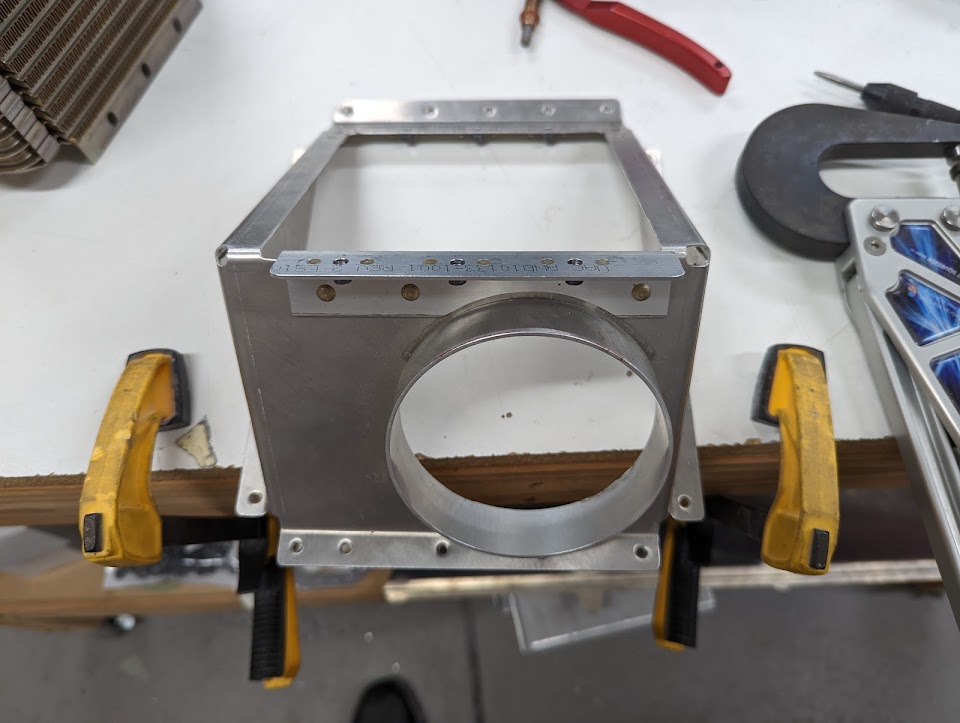
With my intention of using 2 EarthX batteries, I had to figure out how to attach them (the standard bracket doesn't do a good job since the batteries are smaller).
Physical parts for the battery installation
I took that as an excuse to learn Fusion 360, model the parts, and sketch some ideas there:
I started with some custom brackets to attach it to the existing structure, unmodified:
Higher "shelf" for the second battery
Battery hold-down bracket that only attaches the EarthX vertically
Battery hold-down bracket that fits the EarthX shape all around it
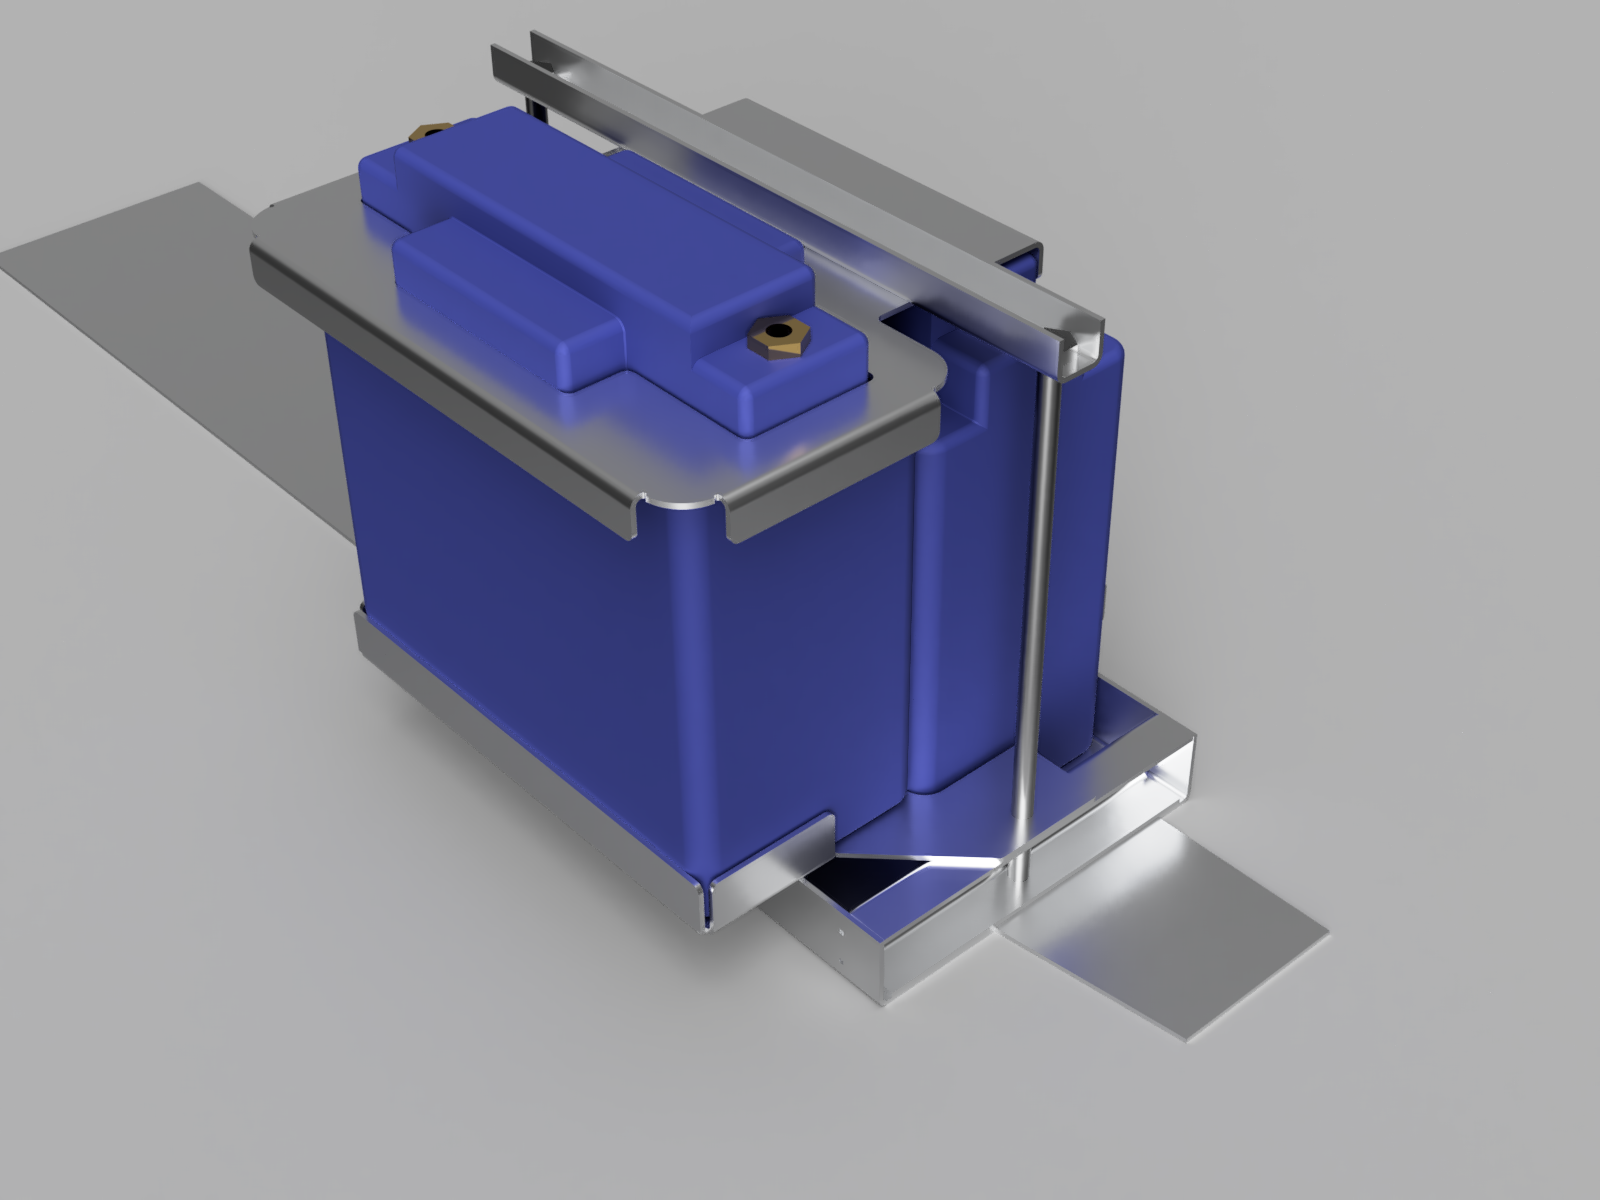
Those would work, but they add some weight and are not really "elegant" solutions, so I tried a few options with EarthX's official box (which I also had to model):
Attaching the batteries with the EarthX official box
Attaching the batteries with the EarthX official box, laterally
(if these models are useful to anyone, you can find them here)
I showed this to Van's support and they didn't like the idea of the underlying ribs being loaded asymmetrically, so I ended up cutting both sides and using their battery boxes:
EarthX battery boxes
The goal is to double-flush rivet them (with a spacer inbetween), so I had to do some testing on thicknesses and rivet lengths before cutting the spacers (ended up with 0.063" for the spacers):
Double-flush rivet thickness testing
Battery boxes clecoed together with spacers
Machine-countersunk battery box holes
I cut of the sides of the original battery mount and attached the new joined boxes to it:
Modified battery mount
Battery boxes on the new battery mount
After primer, I'll rivet this all together and effectively complete section 10.