If you thought that I was done sanding the doors, you were wrong :)
To adjust the gap between the doors and the cabin cover, I used a .032" strip as a "feeler gauge" to sand the edges until it passed, then ran the Dremel cutter disk (which is about .04" thick) through it - that gave me a nice uniform gap all around (except in a few spots where the gap was already larger):
"Gauge" for judging the door gap
Uniform gap between the door and the cabin cover
I was worried that the edges of the doors are already kinda thin, so I instead preferred to sand down the cabin cover edges, since those are pretty thick:
Sanded-down cabin cover edges to adjust gap to the doors
I also countersunk the screw holes for the gas strut attach bracket:
Countersunk gas strut attach bracket holes
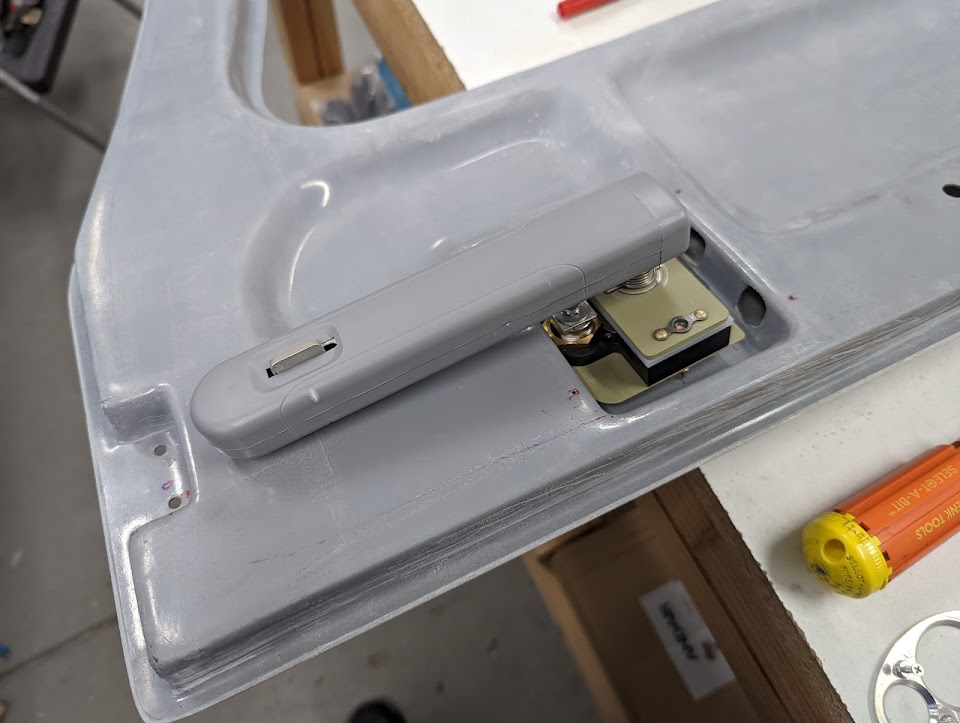
Next, I disassembled all the door mechanisms - latch/lock, hinges, etc. to prepare it for painting. I took the opportunity to attach the Aerosport handle covers:
Aerosport door handle cover in place
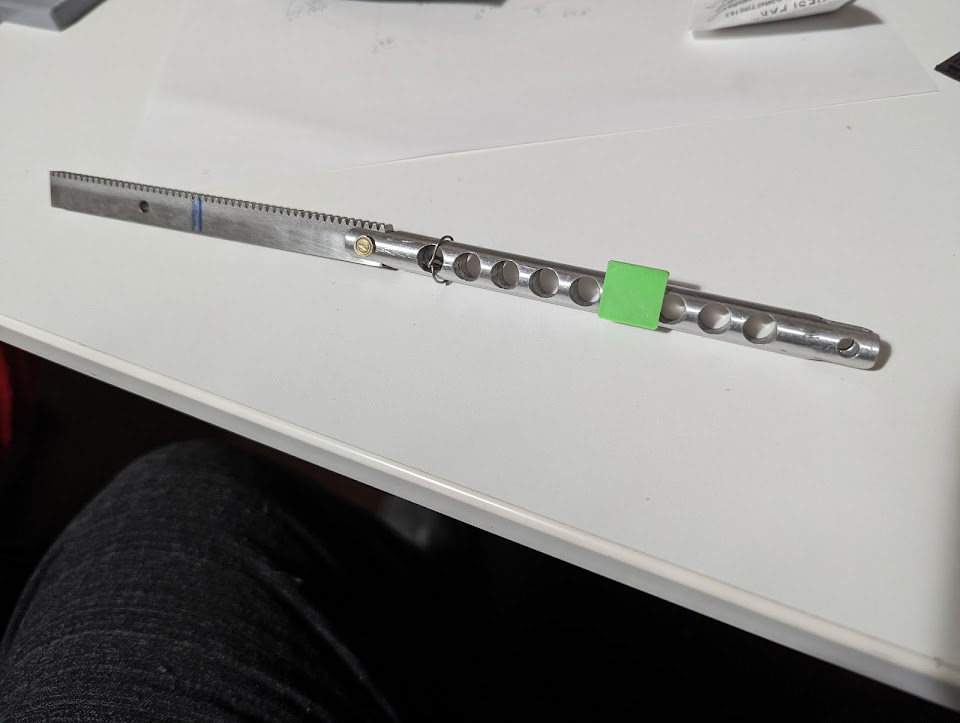
I also decided to use that extra hole on the door (the one that's used for attaching and safety-wiring the pin) for an analog "door latched" indicator, which I printed with ABS:
Door pushrod with latching indicator installed
3D printed door latch indicator
Door "indicator hole" showing green when the door is latched
After removing the cabin cover, I opened up holes on the sides of the overhead console to fit the gas strut attach brackets:
Gas strut attach bracket coming out through hole in the overhead console
Overhead console with gas strut attach brackets sticking out
I sanded the inside of the hinge pockets for the reinforcement plates, and trimmed the corner of one of the gas strut attach brackets so it wouldn't interfere with the reinforcement plate:
Interference between left gas strut attach bracket and door hinge reinforcement plate
Gas strut attach bracket with a corner removed
We then permanently attached the reinforcements with epoxy/flox (with the screws secured in place to ensure alignment and keeping the resin out of the holes), and built up underneath the gas strut attach brackets to give a solid surface for it to rest against:
Door hinge reinforcement plates glasses into place
Gas strut attach bracket and door hinge reinforcement plate
Gas strut attach bracket surface on the cabin cover, next to the door hinge reinforcement plate
All but one of the screws came off easily - that one that didn't, of course, got stripped and took over an hour to remove, and I ended up drilling/breaking its head off then unscrewing it on the vise:
Removing the stripped screw from the gas strut attach bracket
Luckily, the threads on the bracket seem undamaged.
Next for the doors is finishing and painting the inside surface, then putting all the parts back together, but first there's a ton of work to do on the cabin cover.