Before joining the tailcone to the fuselage, I cut and drilled a tray for avionics (to be refined later when I actually have the avionics to mount):
Match-drilling the tailcone rails to the avionics rack
Avionics rack screwed in place
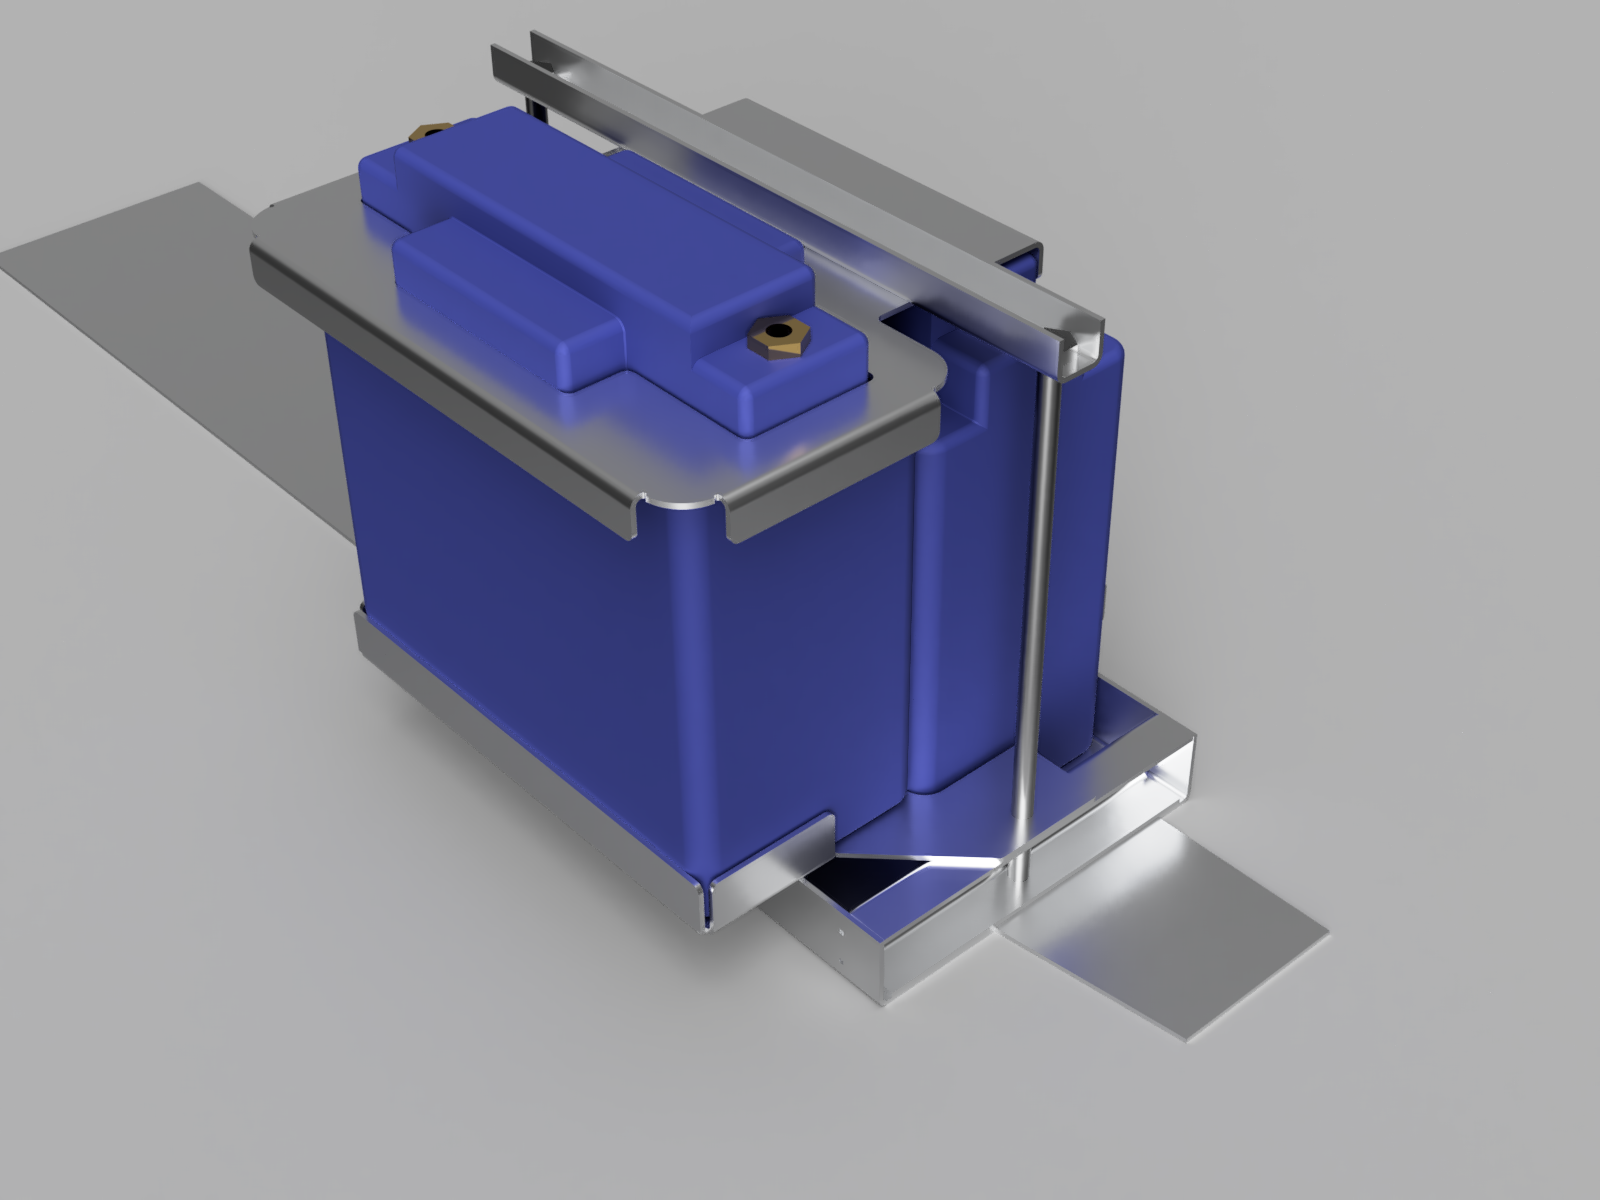
With my intention of using 2 EarthX batteries, I had to figure out how to attach them (the standard bracket doesn't do a good job since the batteries are smaller).
Physical parts for the battery installation
I took that as an excuse to learn Fusion 360, model the parts, and sketch some ideas there:
I started with some custom brackets to attach it to the existing structure, unmodified:
Higher "shelf" for the second battery
Battery hold-down bracket that only attaches the EarthX vertically
Battery hold-down bracket that fits the EarthX shape all around it
Those would work, but they add some weight and are not really "elegant" solutions, so I tried a few options with EarthX's official box (which I also had to model):
Attaching the batteries with the EarthX official box
Attaching the batteries with the EarthX official box, laterally
(if these models are useful to anyone, you can find them here)
I showed this to Van's support and they didn't like the idea of the underlying ribs being loaded asymmetrically, so I ended up cutting both sides and using their battery boxes:
EarthX battery boxes
The goal is to double-flush rivet them (with a spacer inbetween), so I had to do some testing on thicknesses and rivet lengths before cutting the spacers (ended up with 0.063" for the spacers):
Double-flush rivet thickness testing
Battery boxes clecoed together with spacers
Machine-countersunk battery box holes
I cut of the sides of the original battery mount and attached the new joined boxes to it:
Modified battery mount
Battery boxes on the new battery mount
After primer, I'll rivet this all together and effectively complete section 10.


No comments:
Post a Comment