We riveted the firewall doublers to the firewall for attaching the sensors:
Firewall doublers riveted in place
Firewall, showing flush doubler rivets
With that, the bottom part of the firewall is ready to insulate (which will be the topic of a separate post, on section 46).
Meanwhile, I also match-drilled the new laser-cut/anodized O2 distributor flat back covers I had made (which, unlike the standard ones, will give me cabin cover clearance, without needing custom-length spacers), and attached them to the aft overhead panel - that made the distributors stick out the bottom just the right amount that the rubber band sealed them up for a nice finish:
New O2 distributor backing plates clamped to the original for match-drilling
Aft overhead console insert with lights and O2 distributors
Top side of the aft overhead console insert with new O2 distributor backing plates
I then match-drilled the tailcone antenna holes (COM, Stormscope) from the doublers/drilling jigs, and attached the tailcone antennas:
Top COM antenna (left), Stormscope antenna (center) and ELT antenna (right), installed in place
Connection to Stormscope antenna
Bottom COM antenna installed in place
Transponder antenna installed in place
In the tailcone, I also attached the autopilot servos:
Pitch and yaw servos attached in the tailcone
and the avionics shelf and the LRUs that go there, including terminating the GTS800 cables (with those annoying QMA connectors):
Avionics shelf attached in the tailcone
GTR20 (left), WX-500 stormscope (center) and GTS800 TAS (right) installed in tailcone, with TAS bottom cables terminated and attached
(for reference, if anyone chooses a similar antenna/GTS position than I did, the total cable lengths was around 7.6ft)
For routing the Stormscope cables, the autpilot servo cables, and the transponder antenna cable, we attached some Clickbond fasteners just below the shelf (conveniently using the lightening hole on the shelf for one of them, and avoiding the GTS attachment nutplates):
Tailcone avionics shelf with Clickbond fasteners underneath it
We then started working on the GPS/XM antennas, that go inside the overhead console (extra annoying to position doublers):
GPS antennas sitting in place on the cabin cover
All top antennas - GPS (x3), COM, Stormscope and ELT
I started preparing the wire bundles to run from the tailcone forward, starting by de-pinning the forward side of all of them, and reducing the sleeving to be just about the length that takes them into the conduit, then splitting the WX-500 wires from the GTR20 wires (for some reason SteinAir put them in the same bundle, at a random distance which doesn't match my layout):
Single bundle with GTR20 and WX-500 cables made by SteinAir
GTR20 and WX-500 wire bundles after splitting them
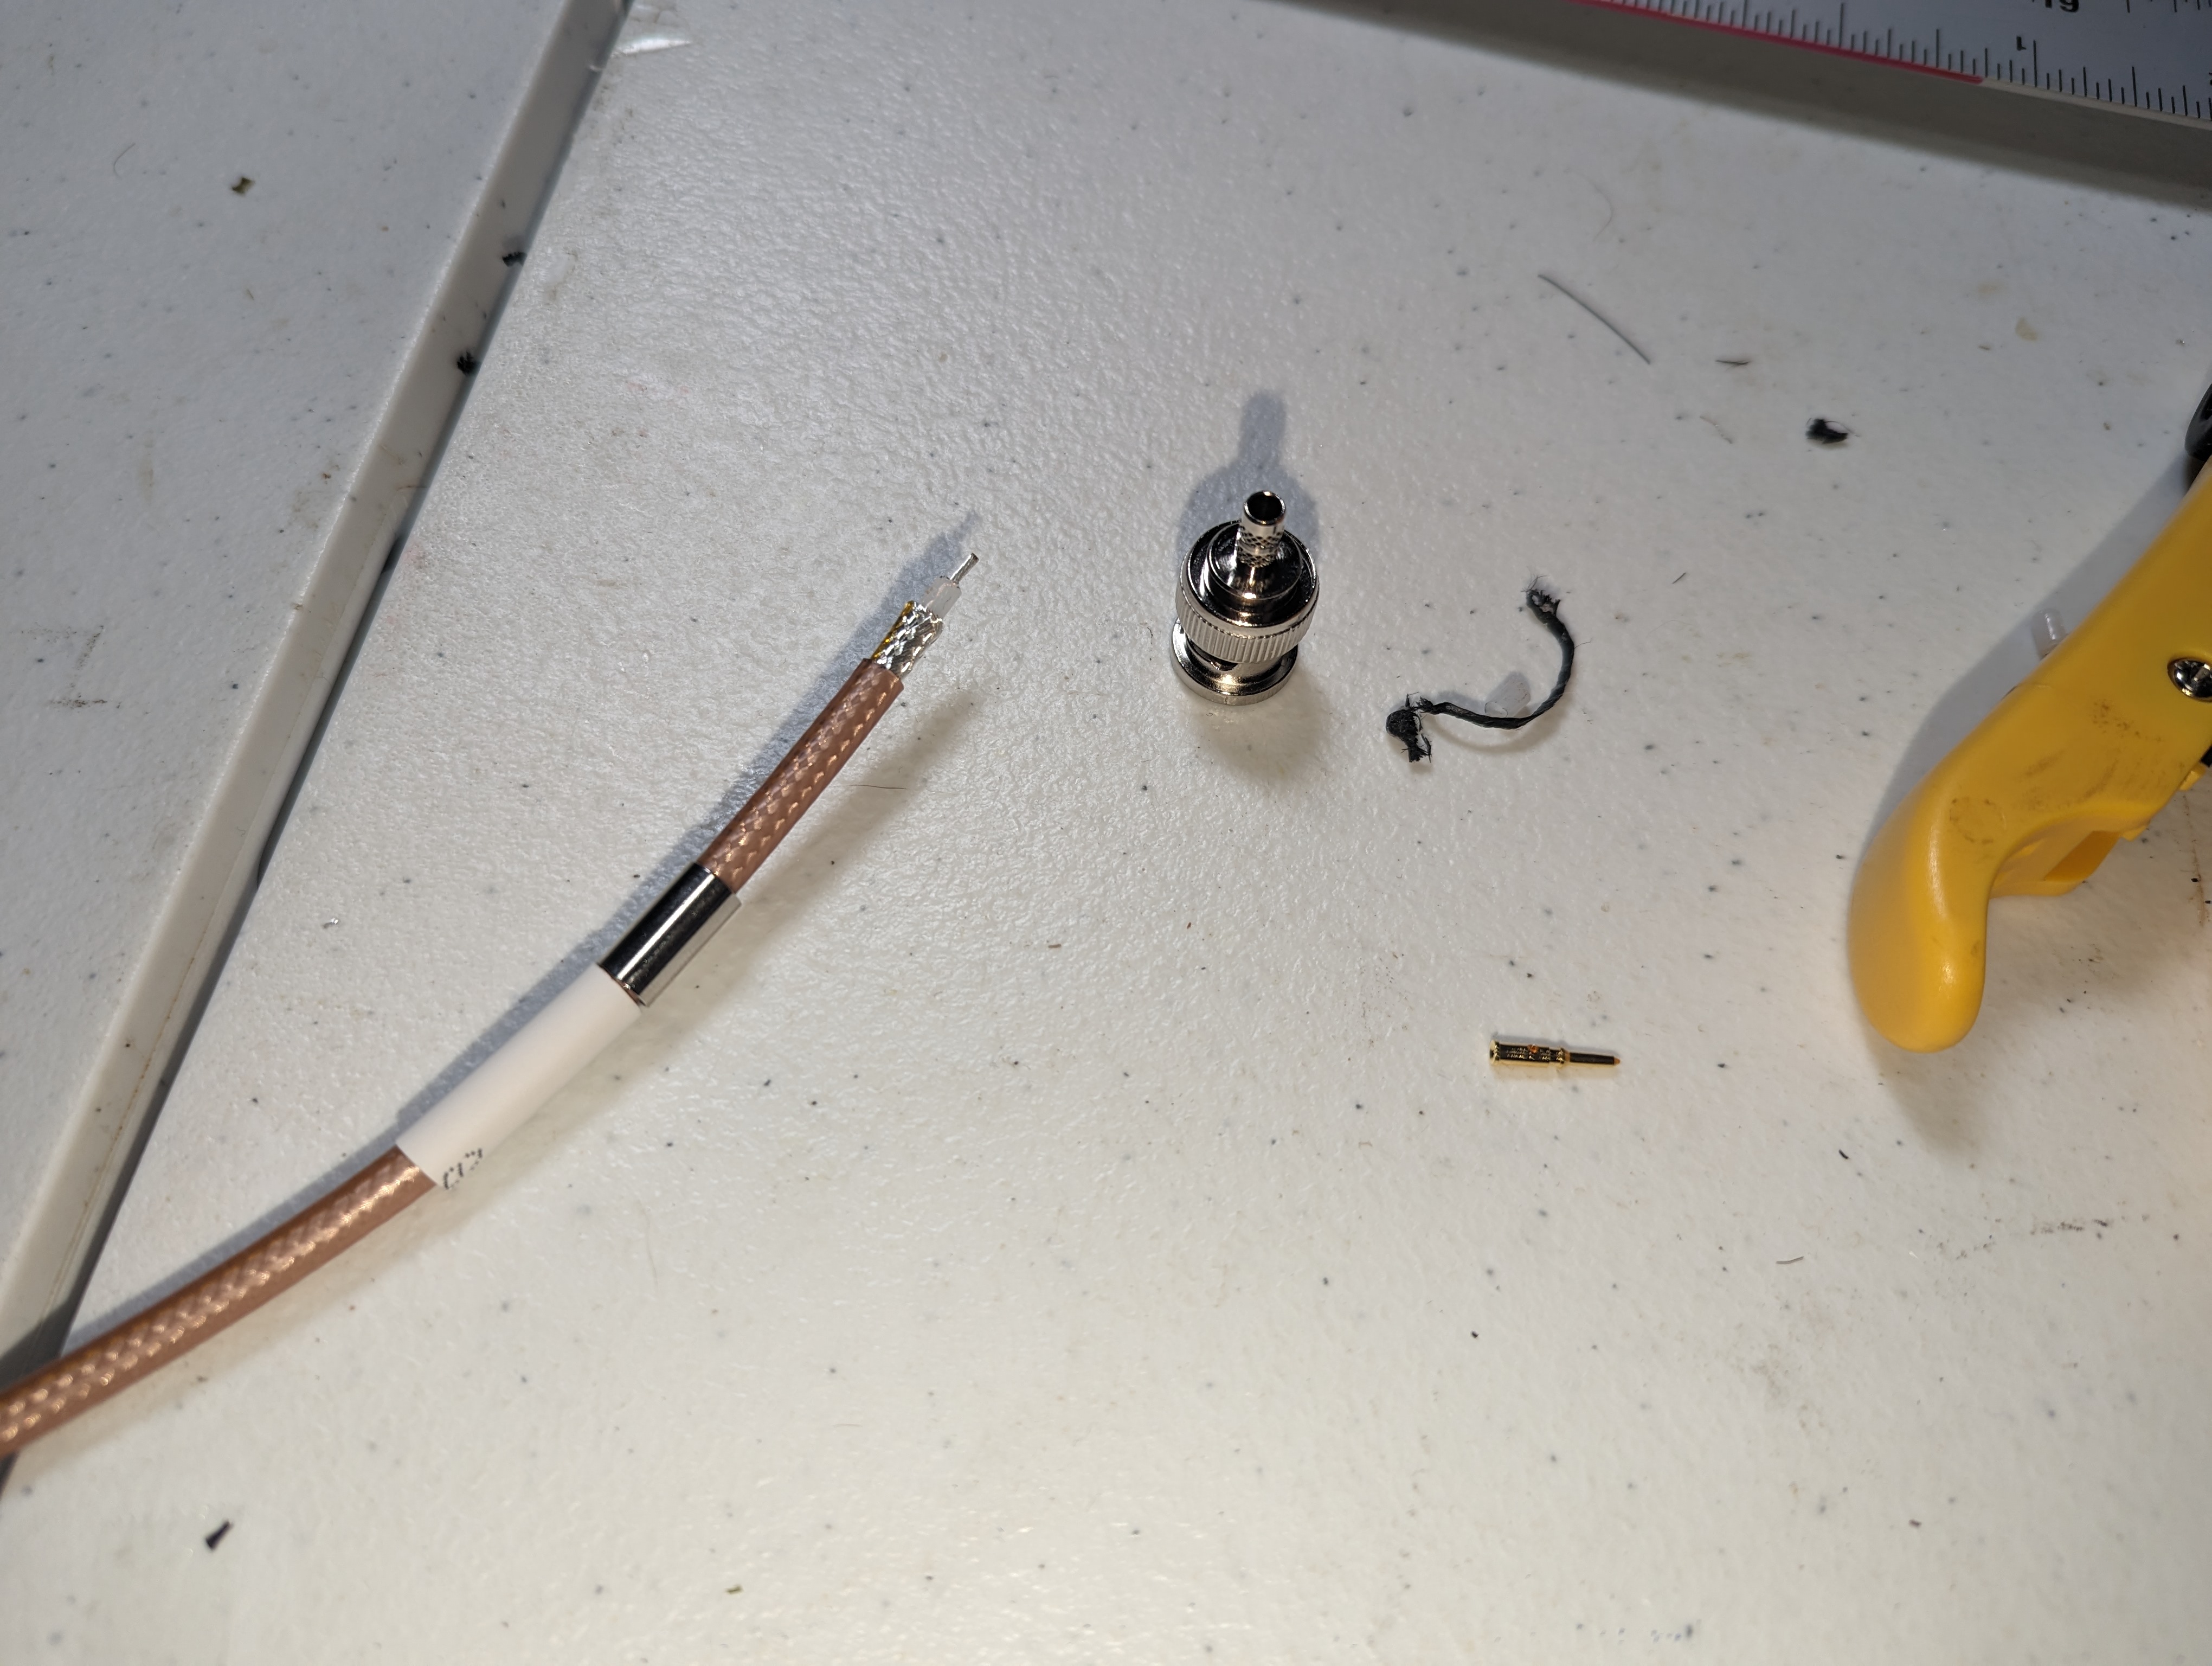
Still in the tailcone, I made the GTR20 antenna cable (from a leftover 4ft piece of coax):
Trimmed-back coax cable and connector ready for crimping
GTR20 connected to its antenna
Once the panel was riveted in place, we also started installing components there, like the AFR and alternator regulators:
Spartan3 AFR sensor controller installed in place
Alternator regulators installed in place
Still lots left to do in avionics - next is actually running all wires between the tailcone and panel.


No comments:
Post a Comment