Cabin cover finishing started

We removed the cabin cover for the last time to finish it up.

There was a pretty big gap between the cabin cover and the overhead console (about 1/4") - I sanded the cabin cover surface a bunch to reduce it, but it became clear that there was no way I was going to close the gap fully without making the fiberglass pretty thin (or getting to the foam core), so instead we built up a "shim" down from the cabin cover to meet the console:

Gap between the cabin cover and overhead console

Laying up fiberglass shim for the overhead console

Overhead console in place to form shim

Overhead console shim after curing

No more gap between the cabin cover and overhead console

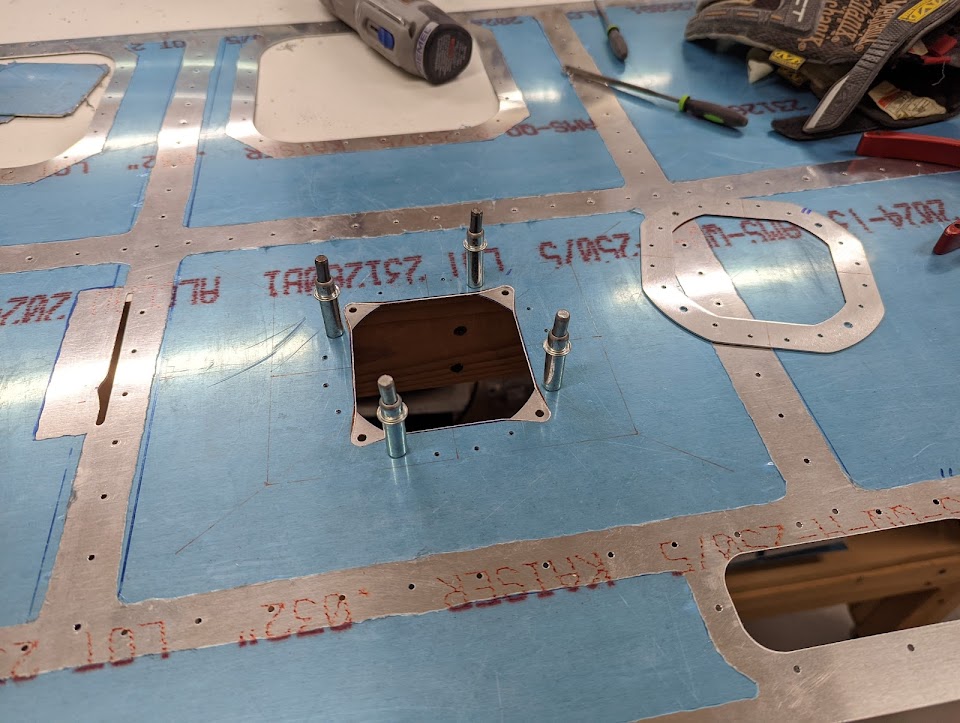
With that, I finished drilling the overhead console to attach it (when we previously detected the gap, we had only made a couple of holes - just enough to keep it in place but not enough for the attachment later):

Overhead console clecoed in place

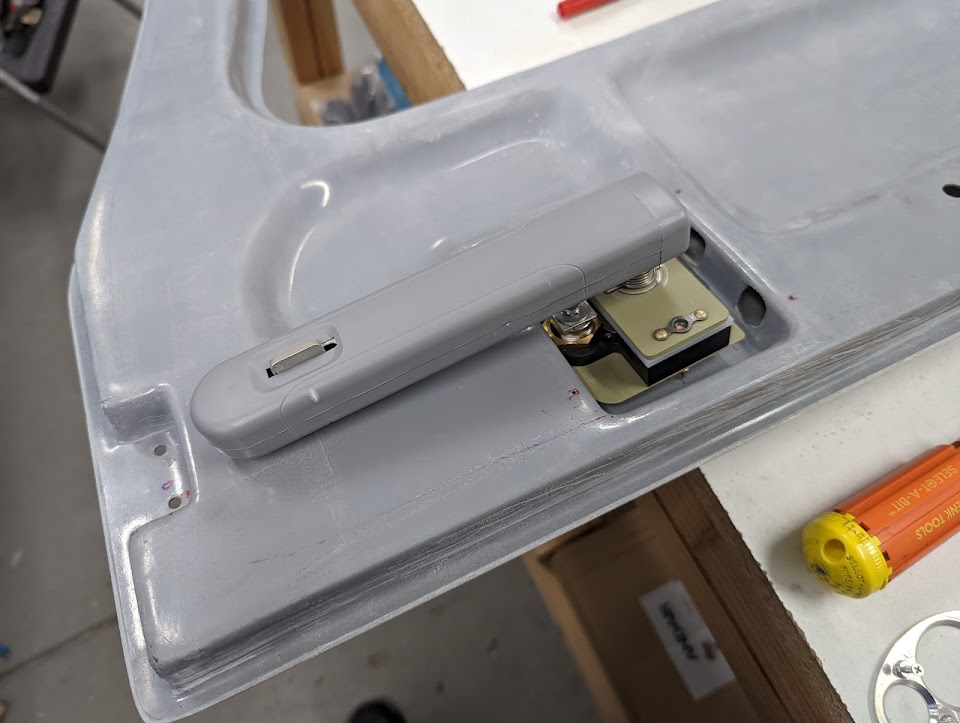
I also made holes for running wires between the console and the switch pod:

Wiring holes on the overhead console

Wiring holes with the switch pod in place

I also attached the ventilation flanges for the overhead console, and riveted the baggage bulkhead channel to the top bulkhead - this may make it a bit harder to rivet the tailcone top skin later, but I didn't really have a choice due to the ordering of attachments:

Overhead ventilation flanges riveted in place


Finally, I started sanding the uncovered parts of the cabin cover, but that's one large exercise in patience, so there's a lot more to do there.

Time lapse:


Total cabin cover rivets: 64
Total cabin cover time: 77h

Interior covers priming and painting

I installed the remaining nutplates for attaching the interior panels:

Interior panel nutplates installed

It was then time to prime and paint most other cover panels:

Applying primer to cover parts

Getting soaked by a burst water hose while washing parts with Prekote

Primed and painted cover parts

I riveted the nutplates and splice plates that go on those:

Painted/primed mid cabin side covers with nutplates on

All cover panels in place

Painted seat back brace closeout, with O2 fill valve brackets riveted in place


Time lapse:


Total access cover and floor panel rivets: 596
Total access cover and floor panel time: 44.1h

Tailcone avionics and battery mounting

Before joining the tailcone to the fuselage, I cut and drilled a tray for avionics (to be refined later when I actually have the avionics to mount):

Match-drilling the tailcone rails to the avionics rack

Avionics rack screwed in place

With my intention of using 2 EarthX batteries, I had to figure out how to attach them (the standard bracket doesn't do a good job since the batteries are smaller).

Physical parts for the battery installation

 I took that as an excuse to learn Fusion 360, model the parts, and sketch some ideas there:


I started with some custom brackets to attach it to the existing structure, unmodified:

Higher "shelf" for the second battery

Battery hold-down bracket that only attaches the EarthX vertically

Battery hold-down bracket that fits the EarthX shape all around it

Those would work, but they add some weight and are not really "elegant" solutions, so I tried a few options with EarthX's official box (which I also had to model):

Attaching the batteries with the EarthX official box

Attaching the batteries with the EarthX official box, laterally

(if these models are useful to anyone, you can find them here)

I showed this to Van's support and they didn't like the idea of the underlying ribs being loaded asymmetrically, so I ended up cutting both sides and using their battery boxes:

EarthX battery boxes

The goal is to double-flush rivet them (with a spacer inbetween), so I had to do some testing on thicknesses and rivet lengths before cutting the spacers (ended up with 0.063" for the spacers):

Double-flush rivet thickness testing

Battery boxes clecoed together with spacers

Machine-countersunk battery box holes

I cut of the sides of the original battery mount and attached the new joined boxes to it:

Modified battery mount

Battery boxes on the new battery mount

After primer, I'll rivet this all together and effectively complete section 10.

Time lapse:


Total tailcone rivets: 1866
Total tailcone time: 231.8h

Glareshield fan mounting

I got Noctua fans for cooling the panel equipment (+a bit of defrosting), and made doublers to attach them:

Hand-made doubler attached to the Noctua fan

I didn't like the result (there was a few gaps around the fan, and it was kind of irregular), so I instead laser-cut one, which fit perfectly:

Laser-cut fan doubler over the Noctua fan

I match-drilled/cut those to the forward top skin, right aft the center of each aft center section, leaving a wider cut for recessed screws:

Match-drilling the fan doubler in place

Fan cutout with the doubler in place

Finally, I deburred all the subpanel parts and put them away until I'm ready to install the avionics.

Time lapse:


Total S time: 22.7h

Door gaps and cabin cover attachments

If you thought that I was done sanding the doors, you were wrong :)

To adjust the gap between the doors and the cabin cover, I used a .032" strip as a "feeler gauge" to sand the edges until it passed, then ran the Dremel cutter disk (which is about .04" thick) through it - that gave me a nice uniform gap all around (except in a few spots where the gap was already larger):

"Gauge" for judging the door gap

Uniform gap between the door and the cabin cover

I was worried that the edges of the doors are already kinda thin, so I instead preferred to sand down the cabin cover edges, since those are pretty thick:

Sanded-down cabin cover edges to adjust gap to the doors

I also countersunk the screw holes for the gas strut attach bracket:

Countersunk gas strut attach bracket holes

Next, I disassembled all the door mechanisms - latch/lock, hinges, etc. to prepare it for painting. I took the opportunity to attach the Aerosport handle covers:

Aerosport door handle cover in place

I also decided to use that extra hole on the door (the one that's used for attaching and safety-wiring the pin) for an analog "door latched" indicator, which I printed with ABS:

Door pushrod with latching indicator installed

3D printed door latch indicator

Door "indicator hole" showing green when the door is latched

After removing the cabin cover, I opened up holes on the sides of the overhead console to fit the gas strut attach brackets:

Gas strut attach bracket coming out through hole in the overhead console

Overhead console with gas strut attach brackets sticking out

I sanded the inside of the hinge pockets for the reinforcement plates, and trimmed the corner of one of the gas strut attach brackets so it wouldn't interfere with the reinforcement plate:

Interference between left gas strut attach bracket and door hinge reinforcement plate

Gas strut attach bracket with a corner removed

We then permanently attached the reinforcements with epoxy/flox (with the screws secured in place to ensure alignment and keeping the resin out of the holes), and built up underneath the gas strut attach brackets to give a solid surface for it to rest against:

Door hinge reinforcement plates glasses into place

Gas strut attach bracket and door hinge reinforcement plate

Gas strut attach bracket surface on the cabin cover, next to the door hinge reinforcement plate

All but one of the screws came off easily - that one that didn't, of course, got stripped and took over an hour to remove, and I ended up drilling/breaking its head off then unscrewing it on the vise:

Removing the stripped screw from the gas strut attach bracket

Luckily, the threads on the bracket seem undamaged.

Next for the doors is finishing and painting the inside surface, then putting all the parts back together, but first there's a ton of work to do on the cabin cover.

Time lapse:


Total cabin door rivets: 130
Total cabin door time: 172.3h

Baggage door complete

We finally removed the cabin cover for the last time, which allowed me to finish riveting the door hinge frame, and the left baggage cover:

Door hinge frame fully riveted (yes, I used CherryMax, don't judge me :) )

Left baggage cover riveted in place

With this, section 34 is 100% complete.

Time lapse:


Total baggage door rivets: 196
Total baggage door time: 15.6h