I mounted the panel on the plane, and realized the GTN rack didn't fit - so like many before me, I had to trim that center rib (though much less than I have seen others do):
Center panel in place (minus the GTN rack which doesn't fit)
GTN rack fits after trimming center rib
Complete center panel in place
Also, since the GTN and GNX were so close to the subpanel, I had to open it up for the connectors and fan to go through (a doubler will be added later):
Subpanel with holes for GTN/GNX connectors, and trimmed rib
GTN backing plate through the subpanel hole
The GNX holes were a bit too low and required adjustment, but the were fine on the second attempt:
GNX backing plate viewed through the subpanel hole
To keep the racks from vibrating, I also attached the back fo the GTN rack to the center rib (which also serves to reinforce the part of the rib that I removed):
Aluminum angle (top left) attaching the top of the GTN rack to the trimmed rib
I also measured and, to make it ever simpler, there's enough of a gap between the GTN itself and the inside of the rack (0.095"), that I don't need to dimple those holes upward and use countersunk rivets - the shop heads will fit just fine.
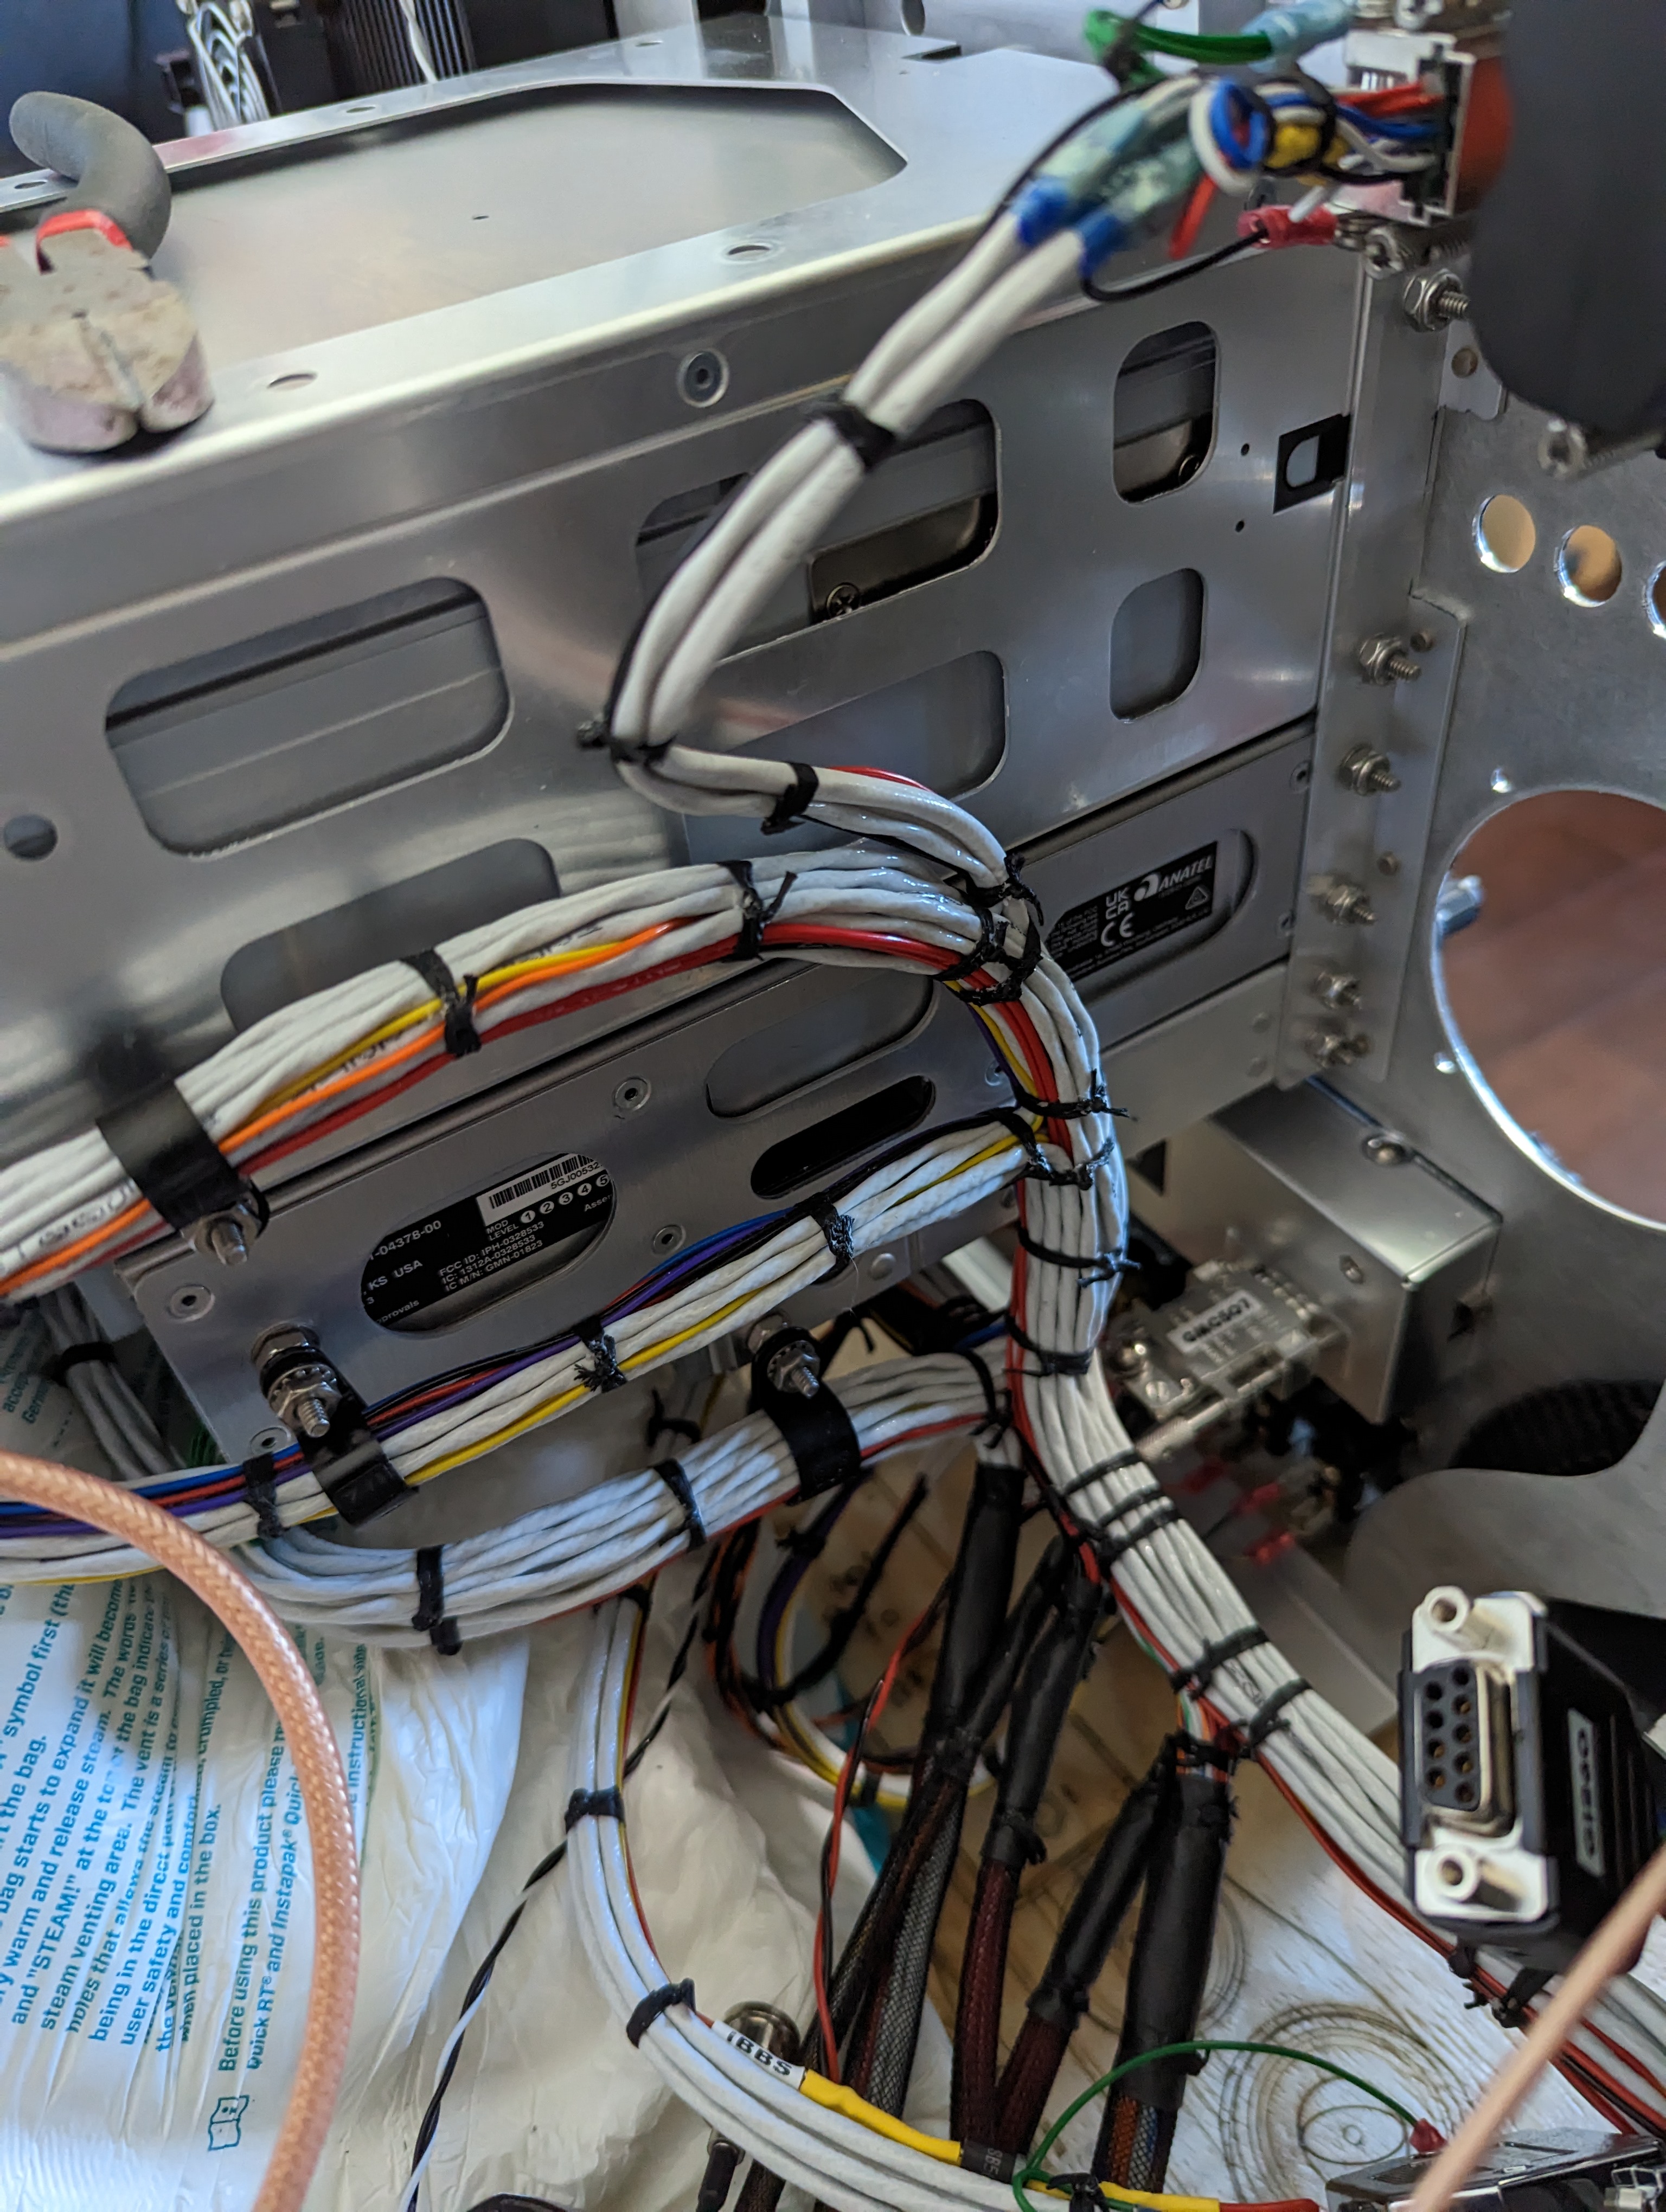
Finally, the wire bundle that Stein made was not long enough to go around the bottom as I had hoped :/ so I had to further enlarge that opening to let the wires through the original route:
Original SteinAir routing for the GTN/GNX/GMA
Enlarged opening for the GTN and GNX bundles to go through (black part is just temporary rubber edge protection so the wires can rest on the unfinished edge)
Next I'm going to attach all the LRUs (I'm making a separate post about the rest of the avionics install, and keeping the section41 tag only for the structural modifications), and then will come back to this section, make doublers, and rivet everything.


No comments:
Post a Comment