While waiting for tailcone mod parts to arrive or for weather to prime it, I started the few items of section 11 - "Empennage Attach" - which can be done without having completed the tailcone. Also, given that some parts used in this section are only included in the fuselage kit, and given that I don't have room in the garage to keep the fully assembled empennage (and still work on a fuselage and wings) it'll be a long time until I really complete the section.
I fabricated the F-1098 shims:
Shims marked for cutting
I put together the trim mount bracket, and to keep the brackets aligned, I used reference lines before drilling them:
Trim brackets aligned for drilling
I then primed and riveted it all together:
Trim bracket and bellcrank riveted
I put together the trim servo link/spacer assembly:
Servo with link assembly
and then attached it to the bracket:
Trim mounted in its bracket, with the linkage and bellcrank attached
If you notice the two holes on the side of the trim bracket, that's for hanging an aluminum plate with a connector. My intention is to make a single connector for the servo (5 pins) plus the ELT (12 pins if I get the Kannad), but I haven't picked the proper connector yet.
Time lapse:
Total empennage attach time: 6.3h Total empennage attach rivets: 26
I trimmed the hex posts to 2 5/64", which was the exact height to get the APU port's bottom flush with the doubler, then re-finished the trimmed ends - not as good as the original, but good enough:
APU port hex post finish (mine on the left, original on the right)
We then primed the "bottom" edges of the bottom skin which actually go inside the side skins:
Inside portion of the bottom skin's bottom side
then removed the vinyl from the rivet rows:
Vinyl removed from bottom skin rivet holes
Vinyl removed from the side skin rivet holes
I match-drilled the antenna doublers to the bottom skin:
Aft antenna doubler
Forward antenna doubler
then riveted them and the APU port doubler:
Test fitting the ADS-B antenna
Riveted antenna doubler and APU port doubler
Riveted antenna doublers
Before riveting the APU port doublers, I had also riveted the camloc receptacles to them:
Riveted APU port doubler and cover
APU port cover in place
Then came the time to cleco the whole thing together again, for final riveting (except for the F-1006 frame, still with vinyl on):
It all comes back together
Like others, I was initially confused by the order of the bottom skins shown in the drawings, which suggest that the aft bottom skin should go outside of the forward bottom skin:
Rivet goes on aft bottom skin? Nope.
Thanks once again to VAF, I realized that wasn't the case - that one rivet does go on the forward bottom skin.
For the actual inside riveting, I found that's incredibly easier to do with help from another person, and I chose to back-rivet most of it that way:
Wife (underneath) holding the bucking bar while I back-rivet from the top
So far, I have the side and bottom stiffeners mostly riveted:
Right side riveting progress
Left side riveting progress
Inside view of the riveted stiffeners
With this, I riveted the first of the avionics rails to the bottom stiffener, using CCPQ-43 rivets:
Avionics rail riveted to the right bottom stiffener
I also riveted the bellcrank ribs to their angles and the conduit holders:
Bellcrank ribs with angles and conduit holders riveted
as well as the avionics shelf nutplates (I added both the #6 and #8 nutplates so I have more options later):
Avionics shelf with nutplates riveted
I'll likely spend 2 or 3 more weekends riveting before I'm done.
Time lapse:
Total tailcone time: 168.7h Total tailcone rivets: 771
I also riveted the static line T bracket in place:
Static line T angle bracket
I attached the Panduit conduit holders to the frames:
Panduit conduit holders attached to frames
I cut the NACA vent doublers from .040 aluminum:
Cutting NACA vent doublers
then drilled their holes and match-drilled into the skin:
NACA vent drilled in place with doubler
I riveted the NACA valve bracket to the top stiffener:
Riveted NACA valve bracket
After I assembled the APU port covers (put the retaining washers to hold the studs), I also had a "oops" moment when I realized that the washer did not fit inside the countersunk portion of the hole:
Oops - it doesn't sit flush!
The solution was to use a step drill to get rid of the countersunk border altogether, opening up the hole for the washer to fit through:
Enlarged hole for retaining washer
With this, the cover plate now sits flush:
APU cover plate sits flush now
Camloc receptacle height for APU port adjusted
APU port cover test fit
I also realized that I hadn't primed the "exterior" part of the bottom skin which actually goes inside the side skins. I marked those and will apply primer there as well (as soon as weather permits).
Finally, I'm trying to decide whether to rivet the avionics rails to the stiffeners before or after they're attached to the skin (either way, the second set of rivets is harder to set):
Avionics rails clecoed to the stiffener
Time lapse:
Total tailcone time: 133.3h Total tailcone rivets: 209
I continued working on the tailcone mods, and match-drilled the NACA valve brackets to the structure - this required a lot of fine-tuning to get the two brackets aligned properly, and the whole thing aligned with the vent flanges:
NACA valve bracket attachment to baggage bulkhead channel
I also match-drilled those brackets to the NACA valve itself, for #8 screws:
NACA valve match-drilled for screws to attach to its brackets
I match-drilled the lower avionics rails to the stiffeners (riveting these will be "fun"):
Avionics rails match-drilled to stiffeners
I finished the APU port by countersinking the hex post screw holes (for #6 screws - I should have made this out of .080" aluminum to use #8 screws safely) and the Camloc holes:
Finished APU port doubler
The assembled thing actually looks good:
APU port test assembly
APU port test assembly
I clecoed the doubler back behind the cutout:
APU port doubler test fit
then cut the matching cover plate from .025" aluminum, carefully grinded it down to the right size, and match-drilled the camloc holes into it:
APU port cover plate test fit
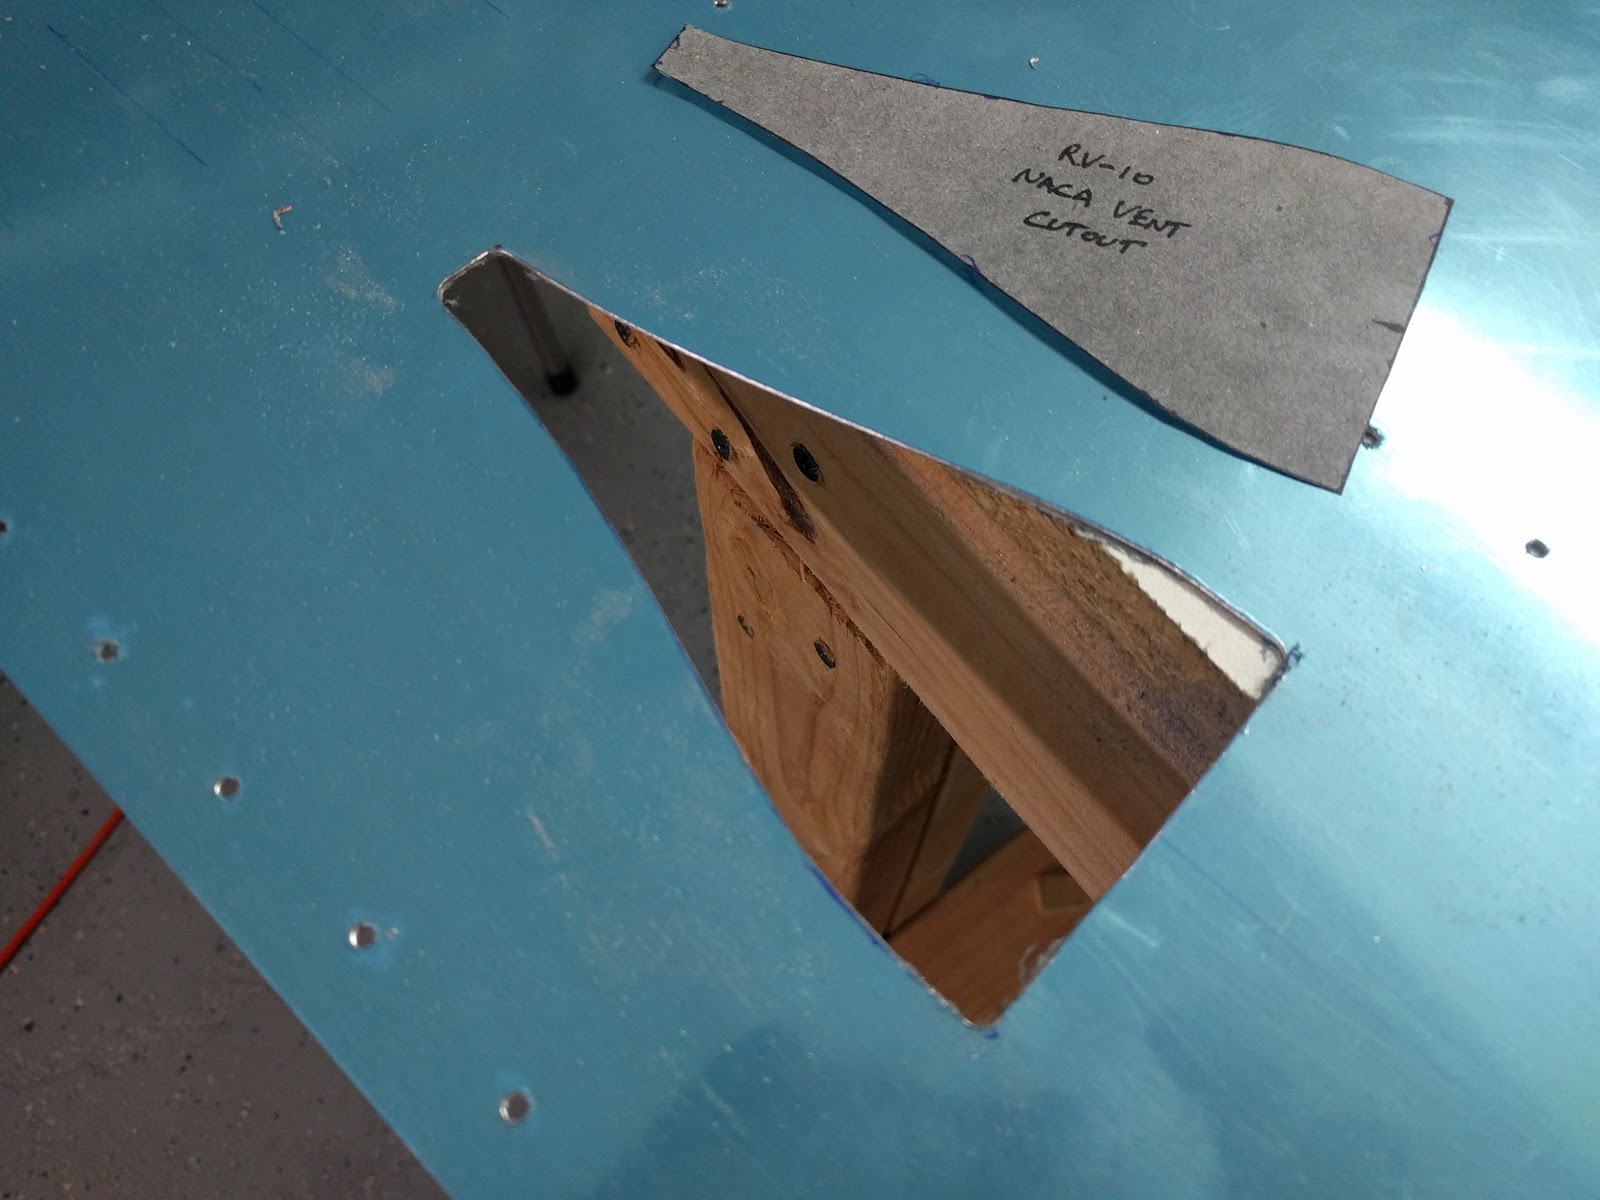
Also, using the template posted on VAF, I finally cut the NACA vent openings - first by drilling #30 holes near the corners, then expanding those to the layout edges with a step drill, and finally cutting the edges:
NACA vent outline
Cutting the NACA vent cutout with the dremel
NACA vent cutout done with my trusty Dremel
The result after deburring looks nice, and I'm proud of not having created a big random cut through my skin :)
Finished NACA vent cutout
I then started the loooong journey of deburring - thankfully the bulkheads were already deburred on their edges, but I still had to deburr their holes, plus all the holes and edges from the skins:
A LOT of holes to deburr
I still have a little bit of deburring to do (the edges of one of the side skins), but other than that everything's ready for primer, dimpling and riveting!
Time lapse:
Total tailcone time: 108h Total tailcone rivets: still 52